Monday, March 15, 2010

Recipe : Ovarian Chocolate Cake

Ovarian Chocolate Cake

This, my friends, is what happens when your hormones demand satisfaction!
You have heard of Bavarian Cream Pies? Well, this is the Ovarian Chocolate Cake.


By nature I am not a chocolate lover. That is not to say that I do not enjoy chocolate, but I am more of a liker than lover. Every now and then though, particularly when I am ovulating I crave sweets, usually in the form of chocolate. And about a year ago, I was craving it pretty bad so I made this cake. It has become a family favourite and I love to make it for special occasions like Father's Day (My dad is a chocolate fiend!) and like yesterday at my (not so)little brother's birthday dinner.

It is a devil's food cake with pudding between the layers, a mousse frosting and cookie crumb coating. It is a fairly involved cake, but totally worth it! Would you like to make one too? Oh goody! Let's begin.

Ovarian Chocolate Cake

Devil's Food Cake Ingredients/Directions

2 cups sugar
½ cup + 2 tablespoons butter, softened
3 eggs, separated
2 cups all-purpose flour
½ cup unsweetened cocoa powder
1 tsp baking powder
1 tsp baking soda
2 tsp vanilla extract
½ cup boiling water
1 cup sour cream

  1. Preheat oven to 350 deg F and grease two 9 in cake tins.
  2. Put cocoa in small bowl; add boiling water and mix until smooth. Let cool.
  3. Using an electric mixer, cream the butter and sugar on medium speed for approximately 5 minutes. Add egg yolks and mix well.
  4. Sift in flour, baking powder and baking soda, add cocoa mixture, sour cream, and vanilla extract and mix well.
  5. Whisk egg whites until stiff and fold gently into the cake mixture. Transfer to the cake tins trying to keep them as equal as possible.
  6. Bake at 350 degrees until a wooden pick inserted in center comes out clean, approximately 40 minutes. Let the cakes cool.
  7. Slice each cake through the middle to make four layers. Let each layer cool before icing.
Now, the easy parts. Filling and icing.

Ingredients (I guess you could call them that)

1 box chocolate pudding (Fudge flavour works really well)
1 cup (250ml carton) 35% whipping cream
1 tsp vanilla
2 tbs sugar
1 box Oreo cookie crumbs (You won't use the whole box, closer to half but I didn't measure this step)

Prepare pudding according to package directions. Spread a thick layer to the edges on three cake layers. And stack to form four layer cake.

To prepare whipping cream put cream, sugar and vanilla in a bown and whip until stiff peaks form. (You can also substitute Dream Whip here if you so choose)

Add remaining chocolate pudding to whipped cream and ice cake top to bottom.

Now, the part that requires a little bit of patience. Adhering the cookie crumbs to the sides without making a giant mess. To do this I poured the crumbs around the cake on the cake platter and then with a knife slowly 'pulled' (for lack of a better word) them up the side of the cake until I was satisfied with how it looked.

And it really does look fantastic doesn't it? But, never mind that how did it taste? Like a little piece of heaven! The combination of fluffy chocolate cake and pudding make for an almost brownie like consistency that is the good kind chewy. Now, there is one little sliver left and I am going to claim it before my chocolate fiend of a father gets it!

Bon Appetit!

Storybook Sunday : I Wished For A Unicorn


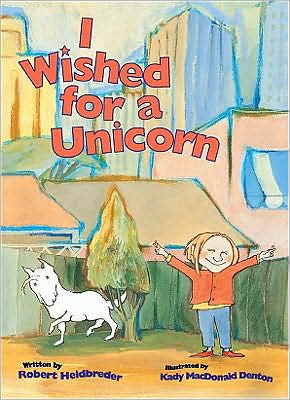
I Wished for a Unicorn by Robert Heidbreder and illustrated Kady MacDonald Denton.

This was the book that inspired this series of posts. I found it so randomly at a charity shoppe that I wanted to share it with everyone so that others may enjoy it if and when they happen upon it or even go looking for it.
The book is a charming book written with such a wonderful rhythm that I actually enjoy reading it to Wednesday, over and over and yes over again. She calls this "My Unicorn Book" and we read it together at least once a day but usually more. It is perfect for her attention span having only one or two four line rhyming stanzas per colourful page. I find that anything more than that and it is anyone's guess if she will stay interested past the first two pages.
But the rhythm in this one flows so wonderful, the verses just roll off your tongue.

The story is about a child that wishes for a unicorn and through sheer will and imagination, has their wish granted...sort of. She goes on an adventure that includes a magic wood, moat monsters and a dragon to mention a few. She (I am presuming it is a she but it could just as easily be a he) and her unicorn don`t stop until they need a nap.

Wednesday's favourite parts have to be the colourful yet scary trees in the magical wood, the howling and the moles that are "Like the Mole Sisters.". My favourite thing about this book is how the title is not I wish I HAD a Unicorn, instead the narrator makes something out of what she already has. Sounds like a familiar concept around here yes...

I pleased to find out when I Googled the author and illustrator that they are both Canadian. It is so rare I happen upon Canadian authors without being directed to them. Also in googling the authors (Kady MacDonald Denton also writes children's books as well as illustrates)I found The Library and Archives Canada website and is it ever wonderful. Canadian or not I encourage everyone to browse through the pages and take advantage of the services it offers. I can tell you that this will not be the last time I visit there.

Robert Heidbreder and Kady MacDonald Denton team up for one more book A Sea Wishing Day and it looks to be just as wonderful, I cannot wait to add it to Wednesday's ever growing bookshelves.

Speaking of Wednesday's bookshelves, you may have noticed the widgets in my sidebar. They are there as recommendations only. I will add books as we buy them, read them and if we love them. I thought it a great way to share with you what we are loving. Make no mistake, Wednesday's bookshelves are plentiful and i cannot wait to show you a picture but for now I am adding books as she loves the not as I do. (I have so many books just waiting for her to be old enough to absorb them!)If you use the links I make a minuscule commission (I didn't even bother finding out what it is I assume it is so small) but for anyone who does, it will let me know that you value my opinion and my head will swell.

Bonne nuit and happy reading!

Wednesday, March 10, 2010

Wednesday on Wednesday

1easter09
3easter09
2easter09

Wednesday's first Easter egg hunt. This was last March. I was not nearly as crafty this time last year so I just bought some super shiny eggs and a bucket and threw them on the grass. She loved it. She was too young to really hunt so instead of making it hard for her we kept it simple. She loved it and when she would open them up and find some real fruit candy all the better. This year they will be one hundred percent less plastic but a zillion percent more awesomeness!

Tuesday, March 9, 2010

How To - Manual Machine Buttonholes

Happy Tuesday folks! The sun is shining and spring is finally in the air around here! With the new season upon us I wanted to make some new changes to the blog, so if it seems a bit of a mess for a couple days, bare with me I just have a gazillion things on the go, one being packing for the move. I cannot wait to show you the new place, but for now it is on the to-do list.

As a precursor to a tutorial you will be seeing here shortly I did a quick photo tutorial on buttonholes. I did this for two reasons, the first being that I know buttonholes are incredibly intimidating to novice sewers. Seriously, how many projects did you/have you avoided because they required buttonholes? Or, you did do the the project but avoided any buttonholes and it just didn't turn out the same? That is why. The other reason is because when I searched for easy tutorials to link for you I couldn't find a single one that did not include using a buttonhole foot. I will admit, my machine has a buttonholer (It is so cool to watch) but not everyone has that option and I didn't want you to not make any upcoming projects because of that that little detail.

A manual button hole is super simple. I developed this method from scratch for the sake of the tutorial having never made a buttonhole before so that should tell you how easy they are. Below is a series of twelve photos numbered to the corresponding step below. Each step is so simple I almost thought about not posting photos but we need photos and then I thought about labeling the collage with one word of text but that was just not quite enough. So hopefully the numbered photos and the super simple written steps written below work for you.

Buttonhole Collage

1. Supplies: Scrap fabric, ruler, marker, razor blade (Or super sharp, super pointy scissors), button
2. Measure diameter of button.
3. Measure thickness of button.
4. Add together and mark on fabric.
5. With marked line on the outside of the needle sew a running stitch around the mark.
6. Check it out, a nice little rectangle guide.
7.
Set zig zag width to 1.25 and use buttonhole/applique/satin stitch setting. Sew around running stitch. You might need to do this twice if your stitches are not close enough together.
8.
With the center of the buttonhole lined up with the center of your foot and needle, set the zig zag width to its widest setting. Mine is 4 and it fit perfectly.
9. At the top and bottom of the buttonhole stitch approx 1/8" to give it some added resistance to wear.
10. With your razor blade (or super sharp super small scissors) slice down the center of your buttonhole, making sure not to get any stitches.
11. Check your button in your newly fashioned hole.
12. Tadaa! You did your very first buttonhole without a fancy machine foot!

If you have any questions, or if any readers have an helpful comments please feel free to share them! And with that, I bid you adieu and happy sewing!


Monday, March 8, 2010

Recipe : Tortilla Lasagna Pie

Tortilla Lasagna Pie

This is one of my most favourite dishes. It is also one of my favourite vegetarian dishes as I make it with beans and veggie ground round. It is so simple and so good I cannot believe I have not shared it before now. It has become one of my comfort food dishes. It is also a fantastic way to use up pantry items and/or left over chili.

Tortilla Lasagna Pie

Ingredients

Tortilla shells 8" work well but if you have a pan big enough you could use 10"
1 pkg Veggie Ground Round or browned ground beef (1lb)
Can of your favourite canned bean (We like black)
1 Green or red pepper diced
1 Onion finely chopped
1 tbsp Cajun or chili seasoning + tsp cornstarch
2-3 cups shredded cheddar

You can also substitute one can (Or two cups of leftover) of vegetarian (like Stag Four bean Veggie) or meat-itarian chili for the beans, veggies, onions and seasoning.


Modus Operandi


Heat 2tbs oil in a pan and add peppers and onions. Saute until soft. Add veggie ground round (or pre-browned ground beef) and beans. Saute until heated through.

Mix spices and cornstarch with a cup of water. Add to bean mixture and cook until reduced to a saucy mixture.

Add 1/2 cup shredded cheese and stir until good and cheesy/gooey. Remove from heat.

Layer:
Tortilla
Bean Mixture
Tortilla
Bean mixture
Tortilla
Bean mixture
Tortilla
Remaining shredded cheese

Pop in the oven @ 350 degrees until cheese is bubbly and brown on top.

Pull out and let rest a few minutes before serving.
Serve with salsa and roasted garlic sour cream (or plain sour cream).
A 9" pie feeds four adults, you could feed more with smaller slices (Like the one pictured) if you served a side like cornbread muffins or something similar. I love this dish though and I chow down on a big piece to myself!

Super simple stuff! Have fun with it and bon appetite!

Thursday, March 4, 2010

My Creative Space - Easter is in the Air


The Morning After, originally uploaded by Cara.Mia.

I have already finished the first part of my Easter gift to Wednesday...I am sure you can figure out what it is? This picture was taken the morning after the bulk of the construction took place. Which means I am about one third done. I still need to make a basket for them to go in as they are collected.


If you haven't been, you must drop by and visit Kirsty @ Kootoyoo and the other creative spacers.

Wednesday, March 3, 2010

Wednesday on Wednesday


Wednesday, originally uploaded by Cara.Mia.

Squishy face! This is how she now smiles for the camera.

Tuesday, March 2, 2010

How To - Refashioned Pants to Toddler Skirt + Vest

Happy Tuesday! To celebrate this very spring-like-but-not-spring day, instead of going outside and enjoying the fresh air (I know! Bad mommy!) I put together a very photo heavy photo tutorial. If you remember the denim skirt refashioning I did last week...I think it was last week...I said that I might be able to rig up a tutorial, well I managed to photograph the same process this weekend. The skirt is not denim and the pleats are not plaid but it photographed nicely and I am ridiculously proud of my efforts. Check it out!

Wednesday


It is made from a pair of stretch corduroy pants that were from Wednesday's big booty cloth diaper days, some flannel remnants and a second pair of cords that I had originally hacked for the project and cut too short off the hop. But, aside from a wonky shoulder seam in the vest, I have to say I have outdone myself. I have never attempted anything like this and with much patience it turned out awesome. AWESOME! I buttonholed for the first time, sewed on flat pockets for the time, MADE A VEST for the first time, made and attached bows for the first time. I learned so many thing making this vest. Did I mention it was awesome? Okay, on to the construction instructions!

Skirt Materials:


Pair of old pants
Fabric for pleating (3x the circumference of cut off pants + 6 inches just in case)
Chosen embellishments (if any)

Vest materials:
Pattern (I used this one from BurdaStyle.com it was free and had easy to follow directions)
Fabric for outer and lining, can be the same.
Buttons x 3
Fabric for pockets (I used pant legs which I show you how to do below.)
Embellishments of choice

Aquire pants.

Cut.

Pin.

Edge stitch.


Super quick video on how to make pleats.
For those who know how, this is where you would make them.


Flip and pin.

Pin.

Turning out to re-pin.

Sew your little heart out.

Match up your pleats ends.

Voila!


I made the bows late last night so I did not take photos. They were super simple though. With right sides together sew a rectangle measuring twice the length you want your bow to be. Leave an inch to turn out. Turn out and top stitch. To make bow center fold a piece of fabric in half, open and fold edges into the center and fold again. Stitch down middle if small, sides if wide. Sew right side ends together and then turn right side out. Pull rectangle through the loop you just made and voila! You have a neat little bow.

Cut bottom.
Cut bottom off one pant leg. Then cut side seams off.
Seperate.
Now you have two pieces of fabric with one finished side each.

Fold & Pin.
Turn over and fold to shape your pocket, I have given you an example but whatever works for you is fine. Pin and press.


I won't go into detail on the vest construction because it is done so well with the pattern. Just REMEMBER to sew these onto the front of your vest before you sew the front to the lining. I sewed my bow on after it was all done, a few hand stitches at the center and in each corner to keep it laying flat.

Skirt and Vest Collage


The entire affair was inspired by the pink cords I cut too short and Easter. The plan was to make a pretty little Easter outfit. I think I succeeded. It is a bit on the warm side being made of flannel, but 'round these parts Spring does not always mean warmth. And doesn't it look great with the pink rubber cowgirl boots?!

If you have any questions at all please do not hesitate to contact me! Until next time, happy sewing!

Linking to...

Whatever Goes Wednesday @ Someday Crafts
Make it & Wear it @ The Train To Crazy
Hand Me Down Rehab @ Helping Little Hands
Get Your Craft On @ Today's Creative Blog
Thursdays Treasures @ Treasures For Tots
Sharing Ideas Wednesday @ The Trendy Treehouse
Hand Me Down rehab @ Helping Little Hands

Monday, March 1, 2010

Thank You Vancouver for an Incredible Olympic Games!


The 2010 Olympic games are officially over. It is almost with a heavy heart that I type this. I had so much fun! And, like Bill Plaschke wrote in his article Canada is a Winter Games Wonderland written for the LA Time "For two weeks, you lived your anthem..." I did. We did. We were determined, successful, generous in spirit, welcoming hosts and patriotic to the core. We were with each athlete every step of the way and we cried tears of joy and tears of loss for every win and every almost-but-not-quite. We jumped out of our seats for the goals and the golds. We Twittered and Facebooked everything that we loved about those seventeen days. We traded our apathy in for honest to goodness caring and concern for everyone involved from athletes, to families of to spectators and everyone else and in between. And it was AWESOME!


Every morning I awoke and this is the first thing I checked, even before my email! Because of our time zone differences, we often won (and didn't win) our medals long after my bedtime. So when I awoke I would go here and check to see what our new medal tally was. It was awesome to see us gaining on Germany and the USA four at a time in the end. And then when me made history with our fourteen gold medals I was overjoyed. This widget was great because with each new medal you just click on your country and it tells you who won the latest events. What countries, what teams, what athletes, what medals. It makes me just a little sad that it no longer tallies. But, that is not to say that I am not incredibly proud and impressed with Canada's final score of twenty six hard earned medals.


I would find videos, and articles that made me both weep (I cried at least twice a day during the Olympics) and laugh and just revel in the joy that is the Olympics. Like this Red Mitten Flash Mob video. I Love it. It just screams lets be happy for happy. And it made me happy.

And when Joannie Rochette won bronze in Women's Free Skate. To overcome the grief of losing her mom just days before to skate the two best skates of her life and end up on the podium. Winning a medal in an event packed full of phenoms from every country is an accomplished in of itself but to do it through the grief, wow. Not just wow though, she took home the Terry Fox award for her efforts and triumphs. Go Team Canada!

I am tempted to embed the golden goal video from the Canada-USA hockey game but I am sure many of you have already seen it. Let's just say I was dancing around here like a fool for a couple hours! Instead, I will leave you with a different sort of skating video, one more like Blades of Glory than the 2010 Olympics but still awesome!

Personalize funny videos and birthday eCards at JibJab!


See you in Russia!!!!!!!!!


Friday, February 26, 2010

Crafting on a Budget...I mean a real budget.

Crafting on a budget.


Mr. Until Wednesday has taken little Wednesday out for a morning drive and some chilly play time in the snow so I thought I would take a break from the hand-sewing and talk to you about something that affects all of our crafty endeavors. Money. Yes, that five letter dirty word. There are so many people out there being uber frugal with their crafty ways and there are so many out there what feels excessive to us have nots. But fear not, there are ways to remedy this. But alas, it takes something besides money, it takes patience. Do you have any?

Beyond an unlimited pocketbook it takes patience. Patience to build up a stash, patience to buy the right tools. patience to learn the skills to make all of the tool buying and stash hoarding worth the hard earned money spent. back int he early nineties when I was first bitten by the crafting bug-you know when country chic really exploded on the decorating scene- I wanted to join the masses. But alas, on my minimum wage budget I could barely make rent let alone go to my local craft store (which only bigger cities had, Michael's was not even a thought around here)and buy up the supplies for a project. I dabbled in sewing having a hand me down machine, but the machine was a piece of junk and it deterred me for years from the craft. This was before Wal-mart was in Canada and dollar stores were not on every corner. Later on my priorities changed and slowly I forgot about crafting completely.

my love

One of my very first attempts at scrap booking.

Enter a baby named Wednesday. Even having a baby didn't really spark the crafting flame so much as the thousands of pictures I was taking. I realized I could not frame every single one of my favourite pictures, bummer. Enter scrapbooking. It was like the clouds opened and light shone down from above while the choir sang. My lost crafting soul had been found. And it was a financially feasible craft at that. I scrapped like a mad-woman for a few months and then Wednesday got just old enough that I couldn't craft for long periods of time. So my interest in it waned just a bit (although the craft supply did not). Enter sewing. I found a brilliant machine on a local message board site for a mere thirty bucks. I was in love. But alas, the machine was so vintage it only had a straight stitch. I felt the need to compensate. I found a Singer Overlock machine for a song. Seventy bucks, and in great working shape. All it needed was a manual I found on the Singer website. Well, after a little bit of practice, but truthfully not a lot of inspiration we moved...again. So my machines went into storage.


I did not give much thought to sewing or crafting until this summer. I needed an indoor hobby for the super hot days and I really wanted to build some toys for Wednesday that would encourage each stage of development. My first project, bean bags. Super cheap, super easy and super fulfilling. Nothing makes you want to keep trying more than the sweet smell of success. So, I kept going, a little felt here, a little felt there. The beauty of felt is it is super cheap, you can buy it by the sheet for as little as twenty five cents. As my confidence grew so did my need for more materials, more tools and believe me, the plethora of crafty blogs ot there does not help one keep there crafty needs and wants in checks. I am inspired multiple times a day by the creative people out there.

Bean Bag Rainbow
The aforementioned bean bags from this post.

Ok, I know you are saying enough about you I want to know how I can build on a budget. Ok, the following list is how I built up a sizable (if not enviable by some) stash in a very short period of time. (Just over a year if you count the machine I bought last spring.)

First, pick a craft. Your money and efforts are better spent with a focus in mind. This will help you decide what supplies will be and even more importantly, the tools you will be buying for your craft. I will use sewing as the example from here on out.

Second. Understand that the right tool for the job is not just relegated to carpenters, plumbers and electricians. I have a professional carpenter hubby and he has thousands if not in the tens of thousands of dollars worth of tools and gear. These tools serve two important functions, they do the job properly and easily with the least amount of stress on the material and himself thereby serving their second function, making him money. It is the same for seamstresses, scrapbookers and tole painters. As a seamstress, we can sew everything by hand but would you if a working machine was at your disposal? How about cutting with scissors? Would you gladly cramp your hand knowing that a rotary cutter and mat were close at hand? Probably not. Also incredibly important is a good working iron. Super important, if your iron only works half the time now would be a good time to replace it. After that, the big stuff is all gravy. The big stuff being dressmaker's dummies and sergers etc. I just wanted to point out how tools are as important if not more than the stash you acquire.


1956 Kenmore C877.15 Sewing Machine
The machine. Isn't it beautiful? And it sews like a dream.

Third. Research, research, research! To acquire these tools at a fraction of the original price, you need to do research. The internet is a God send this way. I cannot imagine trying to get the deals I have gotten with it. Research is so important. get an idea of the tools you need and think you need. Surf the web for reviews both on retail websites and in forums. The best reviews I find are the message boards asking and answering questions on the subject. After you know what you want now we need to find it for a fraction of the cost. Know your budget and don't stop until you find what you need within it. sewing machines are super easy to come across free or near free. Even the super heavy duty awesome ones. Ask your aunts, moms, sisters and grandmas if they have a machine in a closet somewhere collecting dust, you would be surprised how many do. My grandma (who is my mom's mother-in-law) handed her a free 1972 Kenmore sewing machine that is easily the most brilliant machine I have ever sewed on. In fact it is the machine I have used to sew everything I have posted on this blog. (My machines went into storage remember.) No one is giving their machine's up? That is okay, there are a lot more to be had on your local message boards. Like I said before I found my machine for thirty dollars and it was not the only one in that price range (but it sure was the prettiest.) Don't jump on the first one you see either. Ask what features it has, ask for model numbers so you can google it. Ask when the last time (if ever it was serviced) and last, remember int he sewing machine world older is most often better. It is the difference between metal and plastic parts.

Kenmore Model 1757 Zig Zag Sewing Machine
This is the machine I sew on right now. It was given to my mom and I am secretly hoping she gives it to me. I have another Kenmore machine zig zag machine that my moth-in-law gave to me but it does not have the triple stitch that I love so much on this one.


Sometimes, for the smaller tools you can find them listed online as well being sold second hand but you are better of buying these new. Because if you have to replace an item it stops being cheap right? Spend as much as you can afford the first time and you'll be happier I promise. And, it is not hard to do on a budget either. Thanks to companies like Michaels and JoAnnes you can take your 50% off coupons in and buy your rotary cutters, scissors and self-healing mats for half the cost. And with Michaels, you can take your coupon once a day every day until it expires. See where the patience thing is coming in to play? Michaels in the town next to mine so I can't go in everyday, but I do make sure I keep a current coupon in my purse in case we have the time and money to stop in for a moment. One more thing on hand tools, if you have friends who craft, use their tools. This will give you a better idea of what is more comfortable for you and what features are practical and what ones are not. For instance, I have been using my mom's rotary cutter while I decide which one I want. I like hers but at the same time I know I will not buy the same one. I will make sure the one I buy is more comfortable to hold. But I did buy my 36x24" self heating mat for thirty dollars, normally it is sixty. I have used it innumerable times in just the few short months have owned it. Worth every penny of the thirty dollars I spent on it.

Okay, so now you have your tools. Just the basics, but good ones. Now you are ready to build up that enviable stash. And I know what you are thinking, there is no way I bought my tools first and my stash second. Well, you are wrong...and right. I bought my tools first. The machines were so reasonably priced I bought them within days or weeks of each other. But for fabric I just had a giant vinyl comforter bag filled with clothing and bed linens that were destined for charity or the garbage. I didn't sew much in the beginning. I made napkins our of some of Mr. Until Wednesday's old dress shirts and a closet curtain for the bathroom and like I said, we moved. Fast forward to today. I have a beautiful stash that leaves me wanting very little. (besides everything else lol.) But I did this slowly. Once a month I go to the two charity thrift shops ion town and I would spend ten or fifteen dollars at each one. Tops. I just could afford any more. But that ten or fifteen dollars would buy me a vintage sheet here, a wool blanket there. Some yardage remnants and clothes to embellish. I have also built up a formidable wool sweater stash. Thirty dollars at a time my stash grew. Whenever I went to Wal-Mart I would poke into the remnant bin to see what one or two dollar items they had. But, most helpful of all but also the most expensive was my trips to Value Village. I don't do this often because I go way over budget. But the splurging feeds my craft for months after. I am still sewing the vintage sheets I bought in the summer. So, if you have the money to splurge now and again do it. You don't have to do it all the time, I only go to Value Village once every two or three months. But the selection is just incredible, from the vintage sheets to the mens wools sweaters and fabric remnants it is a recycling crafter's dream. And last but not least. Don't throw anything away! Keep clothing for repurposing or refashioning. Take the buttons off, deconstruct it to see how it is made. Take the zippers out. Everything is reusable some how thereby making it free!

Vintage Linen Love
This was first big score. I think when I finally cashed out I spent sixty dollars but it was worth every penny. These sheets have brought me so much joy when I create.

The last piece of the puzzle is practice, practice, practice! All your heard earned money will go down the drain if you are left feeling defeated one too many times. There are so many great tutorials on the internet, both photo and video that it is super easy to learn the basics literally overnight. Learn from the experts, advice is free, my favourite price. Between my mom who is my mentor seamstress who can answer my most pressing concerns and the brilliantly photographed and most generously shared tutorials on the web you are well on your way to enjoying your hobby, guilt free.

Rufflebum Skirt
From bean bags to ruffle bum skirts in six short months is not too shabby eh? Recognize the fabrics? Look at the picture above.

I hope that I helped even just a little bit. I hope that this post was not too long winded. I just wanted to impart some things I have learned about crafting on an incredibly low income. Which I can break down into three things: Allocate a tiny bit every month to help build up your stash. Have patience, soon it will need it's own room I promise! And three, splurge now and again.

Happy crafting!