

I got this idea from a newsletter sent out by Photojojo. I haven't visited the site that the newsletter linked to so I cannot give credit (I try to bookmark inspiration pages for crediting later) but I figured it could not be too difficult. Into the vault it went for later use. At Christmas I was in a chain department store and they had these alphabet block sets on for five dollars each. Now, Wednesday already has a plethora of wooden blocks and wooden alphabet blocks but five bucks, I couldn't pass them up. And when I remembered the photo puzzle and with Christmas on it's way at the time, I thought I was a genius. Well, Christmas came and went and I didn't crack the plastic fo the block sets let alone get to play with Modge Podge.
This valentine's Day and the obsessive nature in which I embraced it was perfect. Forget the fact that I made one on the eve of and the second on the day of! But, that should give you an idea of how easy and quick these come together! So, without further ado, I bring you our ABC Photo Block Puzzle construction instructions.
Materials:
Wooden ABC block set
Photos and artwork of and by child
Modge Podge
Foam brush
Pen
Ruler
Paper trimmer or scissors (A paper trimmer was my very first investment in my craft tools and it was the best fifteen dollars I have ever spent. Watch for Michael's sales if you do not already have one!)
Razor blade or Xacto knife
Construction Instructions
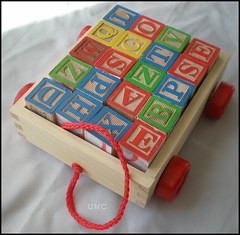
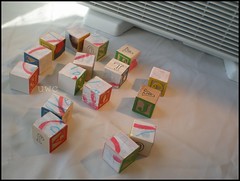
Start with a set of alphabet blocks.
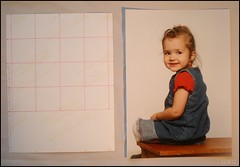
Turn the photo over and grid it off the section you want to be included on the blocks with squares the same size as your blocks.
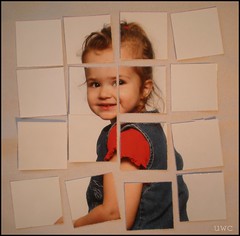
Cut photo into squares.

Coat side of block with Modge Podge, add picture and coat once with Modge Podge once more.
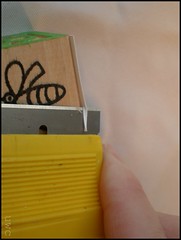
Trim any overhang with a razor blade or exacto knife.

Shampoo, rinse and repeat until all your blocks are covered.

You can cover more block sides with more photos or artwork. I used a hand print and a drawing to cover a total of three sides.
Let dry, if you put them in front of a fan it dries in record time and you can wrap them up for gift giving.
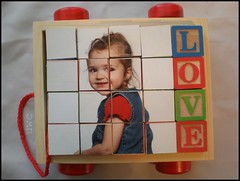
Once dry, you can put them back int heir cart thing and give them to a special person. I gave one of these to each Grandma in Wednesday's life. I should have made a third for Wednesday because she loves puzzles right now and continues to play with these.
This was so easy and a great way to hang out at the kitchen table with family instead of in the back room sewing. So maybe I'll make that one for Wednesday sooner rather than later!
Happy Crafting!
P.S. I know that my tutorials have been taking all sorts of different formats, I am trying to find a cohesive way to format them, but I find it really depends on the pictures, how of them there are and how clear the photos are the smaller they get. Because really, what is the point to a photo tutorial if you cannot see what the heck I am talking about right? So yeah, just saying, I noticed it too ;)
Linked up to Whatever Goes Wednesday @ Someday Crafts


