Thursday, March 17, 2011

How To : T-Shirt Poppy

You know, this blogging thing is not like riding a bike. I took such a long break that I am having trouble typing things like introductions. I know weird right? It could also be that between My Crafty Weekend and the two Tumblr blogs that I have gotten used to typing quick and informative blurbs about photos and posts. Maybe? So how about I just show you a picture of what we'll be making and move on to the directions?
Every now and then I surprise myself.  This jersey poppy is one of those times. There are a lot of fabric flower tutorials out there. Like, a lot. I know, I have them bookmarked! But this is one I don't remember seeing anywhere and came up with just kind of messing around. I think the best ideas come that way don't they? No pressure to create, just playing. Anyhoo, it is super simple, super cheap (Old t-shirts, scraps and eyelets.) and super fabulous. This is how it is done:
Gather ye supplies.


 Voila! Ca c'est tres bon!
Enjoy your awesome handiwork.
This is what I used mine on. More on that (the pillow) next week!
Now go one with your crafty selves! 
♥♥♥

p.s. I'm proudly linking to: 

 Made By You Mondays @ Skip to My Lou
Inspire Me Monday @ Singing Three Little Birds
 Motivate Me Monday @ Keeping it Simple 
Making The World Cuter Monday @ Making The World Cuter
Tutorial Tuesday @ Hope Studios
Creative Share Wednesday @ The Trendy Treehouse
Idea Sharin' Wednesday @ Women Who Do It All
Whatever Goes Wednesday @ Someday Crafts
 We Did It Wednesday @ Sew Much Ado
Strut Your Stuff @ Somewhat Simple
Make It & Wear It @ The Train To Crazy
Weekend Wrap-Up Party @ Tatertots & Jello

Wednesday, March 16, 2011

Monday, March 14, 2011

My Crafty Weekend


Wow another Monday already! And March break too! Are you psyched? This is our first March break, Wednesday attends a play school twice a week and they close with the schools. I didn't realize it until Friday though so I haven't anything awesome planned. Maybe some Grandma time, a little messy paint and glitter fun and a playdate? Hopefully a dinosaur dig at the local museum as well, Wednesday loves her some dinosaur bones.

Last week I seemed to never be home, so I have a lot of projects planned, and even some begun but nothing finished. I did get around to making some flowers though.

Super fun yes? The felt ones were super fast and the tutorial can be found here. The others were a lot more tedious but well worth it yes?! I followed the tutorial for those here.

Ready to see what you crafty folk got up to last week? me too!

The brilliant Nancy of Nancy's Couture has a tutorial for this cute and clever card wallet. You have to know I am making myself one this week, the little plastic thing I use is falling apart (and business cards don't fit anyways!)

The always inspiring Donna of Comin' Home created this clever seed catcher. To get the full how to visit her blog here.

Over at House To Your Home you can check out this gorgeous fireplace make over. Seriously, the before photo will make you drop your jaw. Isn't his just beautiful?

Wow you guys have been busy! What have you been up to lately? Baking, scrapbooking, sewing? How about papier mache? Distressed any great flea market finds? Share with us your creative endeavors! Feel free to grab and share the buttons below! Also, don't forget to visit the link before yours and leave some good comment karma! Have fun crafties!


Wednesday, March 9, 2011

How To : Sew a Vinyl Zippered Clutch


 My latest and greatest creation!
Good morning! I hope your week is going well? Mine has been motoring right along. Between my tumblr blog Storage Geek taking off (447 followers yay!), my sewing space finally being workable, my handmade goods shop looking more and more like a reality, blogger relations (Think sew alongs, read alongs and giveaways!)on the rise oh yeah, and you know, family life I have been kept very busy. And loving it. I forgot how much I thrive in a packced schedule. That old adage "I do my best work under pressure." well that is me in a nutshell. My adage is "If I can't put it off until the night before than it is not worth doing!" (Kind of.) But, during my lull that was December through February I had been saving ideas on my computer, scratching out rudimetary designs in my notebook(s) and gathering my supplies.

Photo Credit: Honestly...WTF
Inspired by this fabulous electric blue zippered leather clutch back in February I have been dying to make one but my leather stash was lost in the move. (No joke, I had a giant soft red leather coat I bought at a thrift shop just vanish in the move it made me very sad.) One day I remembered the faux croc skin vinyl place mat I bought at a dollar store. I had one of those a-ha! moments and now you can share in my joy.

And this is what I made. I made the black and red one last week and used it all weekend as my purse. I made the brown and teal one for the tutorial. Now, making a clutch from a place mat is not necessarily tutorial material, but sewing with vinyl is and also my clutches have no bottom seam, I folded it over which made the zipper sewing a bit tricky. So when you come back looking for the tutorial it will be listed under the techniques section on my tutorial page.

Ok, I think I said the word tutorial enough, lets get on with it!

Materials
Vinyl place mat (Or leather piece)
Zipper (A little longer than the short end of your place mat)
Matching thread
Painter's masking tape (Super low tack)

Modus Operandi

1.
Line tape up with short edge of place mat.I would tell you to do this to both ends now but with the low tack tape it will come off before you get to the second side.

2.
Now it is time to sew the place mat to the zipper wrong side of mat to top side of zipper. Using a straight stitch foot line up tape edge with inside edge of foot. keep them as close as possible while sewing. 

3.

See? Nice clean (approx) 1/8" seam.

4.
When you remove the tape, tear it in half and slowly tear up from the bottom. This makes the seam act like a perforated seam so that you do not rip out your stitching. Same goes with the top half piece of tape, slowly tear downwards to remove it.

5.
MMm, nice clean edge. No fancy zipper foot needed here!

6. 

Now you are going to repeat steps 1 - 3. Because we did not cut the place mat in half we were not able to sew down both sides of the zipper with ease. So when you go to sew the second side, make your zipper is open to the end and the watch the tails.

7.
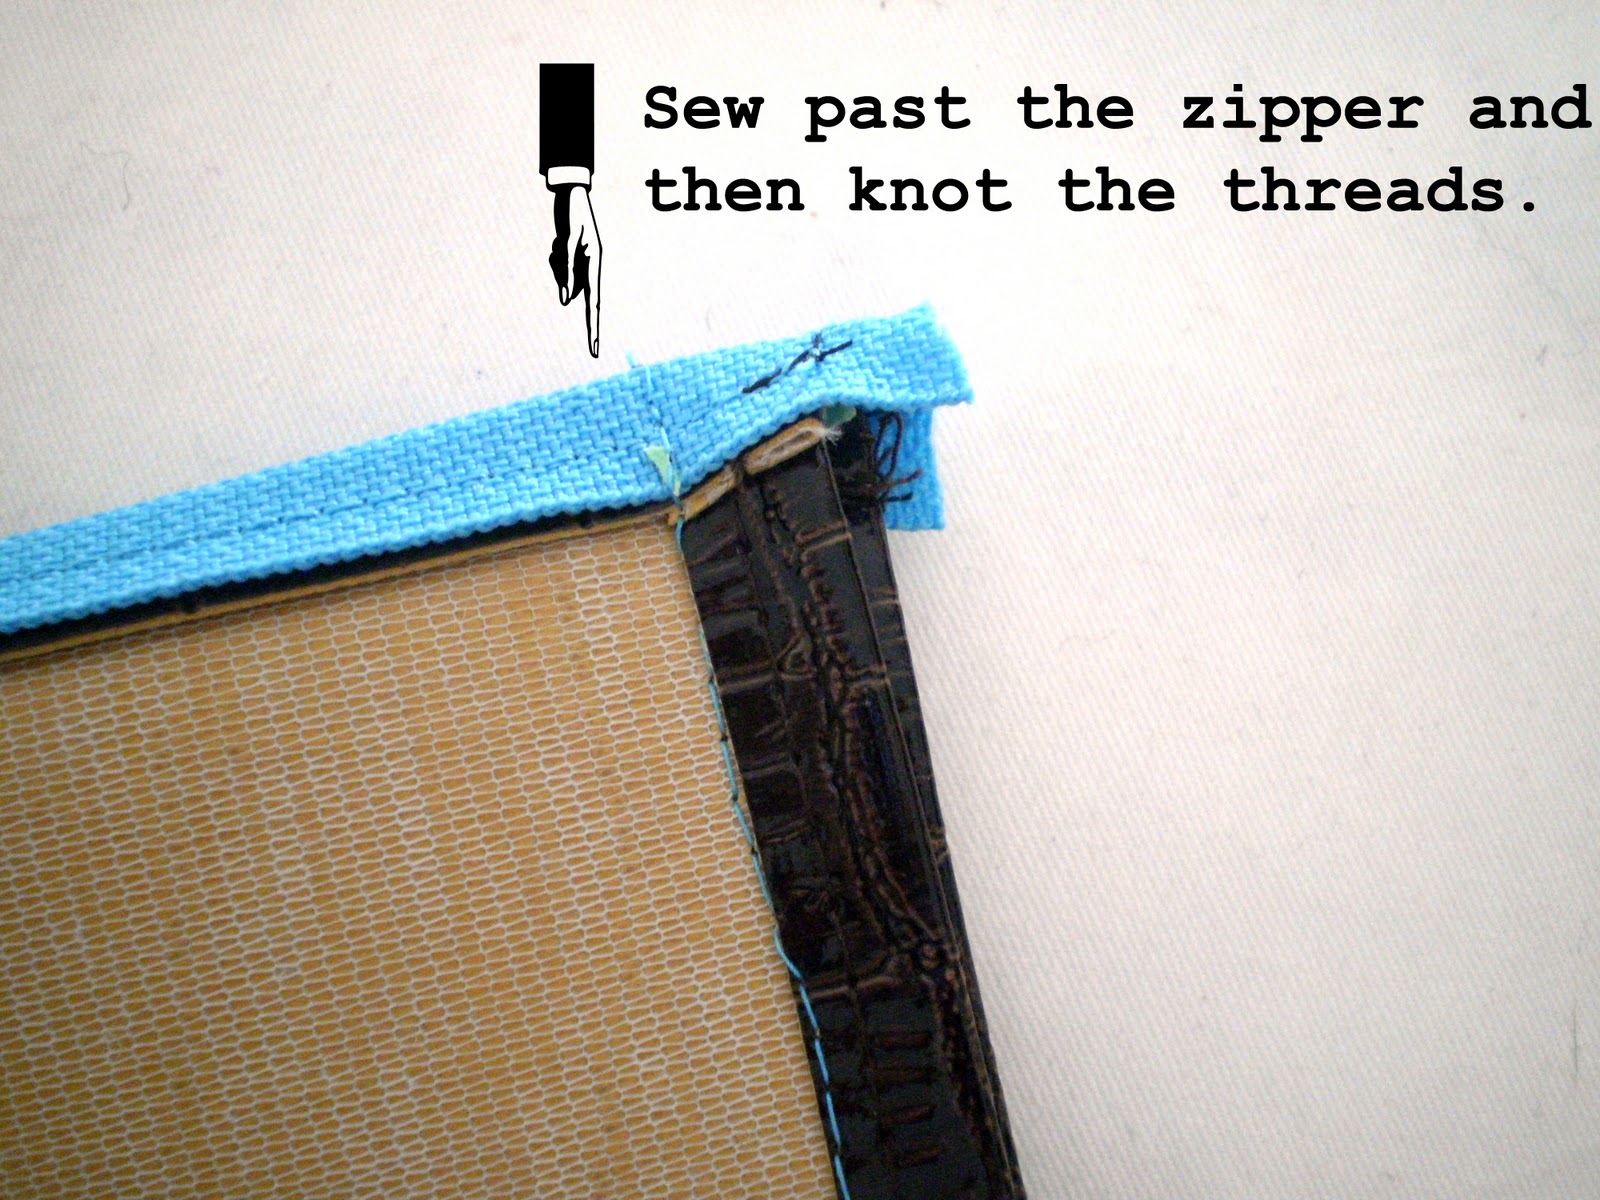
It is fairly easy until you get to the end of the mat/zipper and you notice that last inch is going to be super tricky, stop there. (Sorry for the blurry photo, I was trying to show how it gets bunched up.)

8.
Pull the mat out and turn it around so that it looks like the picture above. Now you can finish that last inch without wrecking your (very unforgiving) vinyl or serious frustration.

9.
Turn inside out. If you have a label to attach, now is a good time to add it in. I opened up an inch of the seam and sewed it closed before sewing the side seams.

10.

Open zipper a couple inches. Now, line up the sides so that they are even at the zipper. You need to sew from the bottom up. Oh yes, I forgot to add tape the sides again, this time top and bottom because now there will be vinyl along the plate too. (I guess you could just tape the metal plate, that didn't occur to me until just now.)

11.
 When you have sewn your side seams and you are happy, trim off zipper pieces.

12.
Tadaa! Your newly fashioned oversized zippered clutch! What I really want is to make one of these with TWO place mats so that it is just huge. Unfortunately, the dollar store I bought the mats at was out of stock so I have to do some shopping around to find more.

And that is all she wrote folks. It has been a long time since I wrote and photographed a tutorial and it is not like riding a bike lol. Anyway, please feel free to ask me any questions I am more than happy to answer them. If they are tutorial related I'll respond here so that others can benefit from the answer.

I will definitely be linking!


 Made By You Mondays @ Skip to My Lou
Inspire Me Mondays @ Singing Three Little Birds
 Motivate Me Monday @ Keeping it Simple 
Making The World Cuter Monday @ Making The World Cuter
Tutorial Tuesday @ Hope Studios
Creative Share Wednesday @ The Trendy Treehouse
Idea Sharin' Wednesday @ Women Who Do It All
Whatever Goes Wednesday @ Someday Crafts
 We Did It Wednesday @ Sew Much Ado
Strut Your Stuff @ Somewhat Simple
Make It & Wear It @ The Train To Crazy
Weekend Wrap-Up Party @ Tatertots & Jello

Wednesday on Wednesday

This weekend Wednesday was invited to a birthday party at Misuraca's Karate Academy. It was really really cool. There was a mini zip-line for the kids, wall climbing and some foam swords and shields play. And at 15 dollars per child (minimum ten kids) (plus an extra fifty for a bouncy castle)it is well worth it. It had a mezanine upstairs for smaller kids with hamster tunnels to rival the local McDonald's (which we don't go to because they smell). But I digress. Although Wednesday did not want ot try the zip line, she did participate in the rest of the activities.

Watching the girls climb the walls.

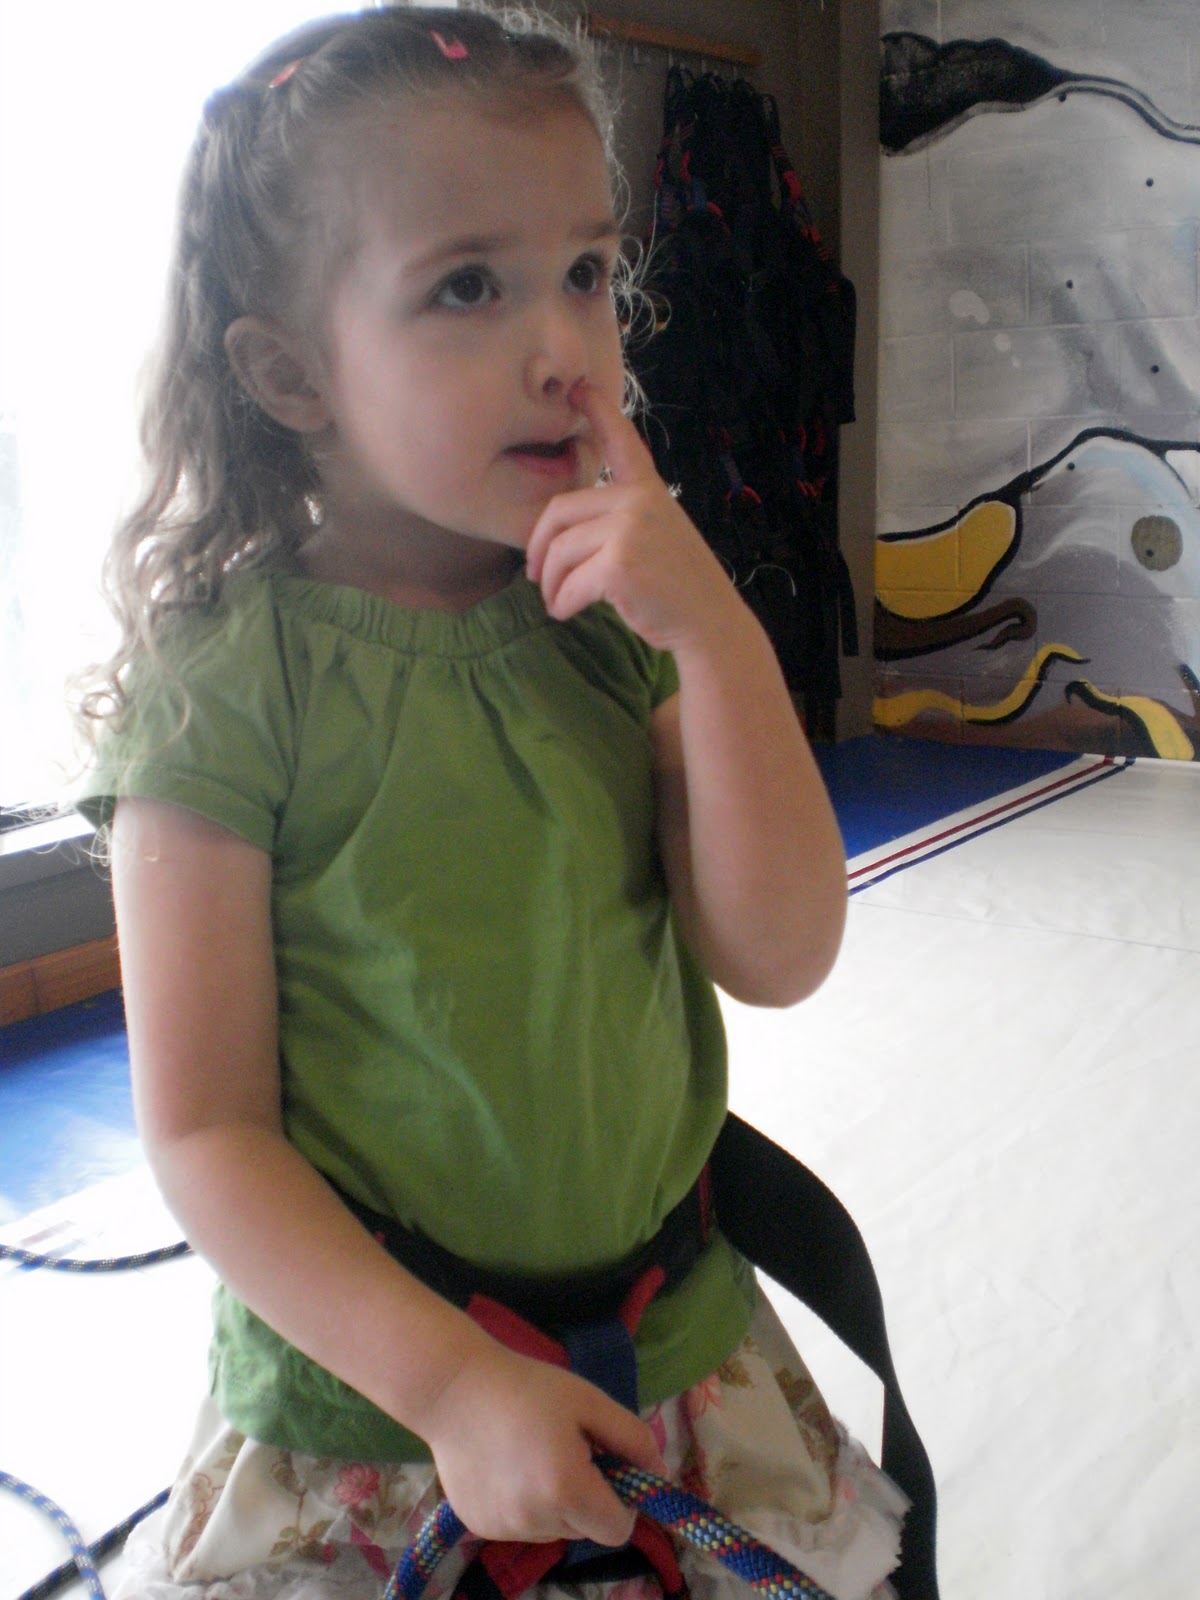
All harnessed up and ready to climb.

This one if for the showing-the-future-date photo album.

Wednesday was the last one to climb and so she had a case of the I-changed-my-minds "I'm not a big girl." (The other girls were mostly 7-8years old.) And when they wandered off she didn't want to anymore.

We managed to convince her to swing for a bit though. She had fun with her daddy and cousin Alli. I was proud of her. (I have a debilitating fear of heights.)

After cake came the sword fights! This was so cool for the girls. Wednesday loves herself some swordplay.
But mostly, she loves to be dramatic.

♥♥♥

Monday, March 7, 2011

My Crafty Weekend


Good afternoon crafties! This post comes to you a little later than usual but still on Monday so go me! I have been working on a tutorial (Yay my first in aaaaaages!)but I need better lighting than what I have been getting. I'll have the post up before the week has ended though I promise! Also in the works is a collaboration with My bloggy BFF Cynthia The Sewing Dork so stay tuned for that announcement. And a few giveaways are in order as well. Super busy times here at Until Wednesday Calls. But enough about me, it is you that you want to see yes?!

In the spirit of march being Reading month, I couldn't think of a more fitting post to start us off today. Amy of Flexible Dreams shares with us how a tub of alpahbet cookies from Trader Joes has begun a spelling frenzy at the table. A tasty one too! To see the nifty ways they played with the letters before chowing down on them visit the post here.

Another fabulous reading related post is this Harry Potter themed one from Anji of Starking Crafty & Party. Visit this post to see the great stuff the kids did in those spell books and to find out how to make those fabulous capes.

Totally unrelated to reading, but amazing all on it's own is this bedroom makeover by Kyra of Racks and Mooby. Those gorgeous flowers were free handed copies from the bedding design. What a wonderful room for a little girl to wake up in.

Now it is your turn again! What have you been up to lately? Baking, scrapbooking, sewing? How about papier mache? Distressed any great flea market finds? Share with us your creative endeavors! Feel free to grab and share the buttons below! Also, don't forget to visit the link before yours and leave some good comment karma! Have fun crafties!