
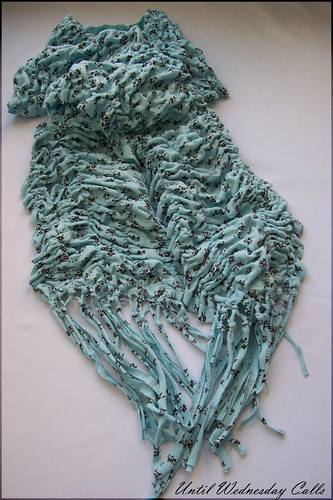
I absolutely love it! I wear it everywhere I go. It is so feminine and yet so comfortable. You have to know that I intend on buying up all of the cotton jersey pajama pants in the nation for more of these! The tutorial has some [badly drawn]photoshop images because I over-complicated the original process. Also, this was one of those things that just didn't offer up the right opportunities for clear, instructional photos. regardless, it is so simple!
Full tutorial after the jump.
Materials
Pair of pajama pants
Optional but very helpful tools:
Rotary cutter (scissors of course will work but I cannot reccomend a rotary cutter enough!)
Gathering foot (If your machine shirrs with elastic you can do that too, if you cannot do either you can hand ruffle it takes a bit more time but not much. I'll link to two good tutorials at the end.)
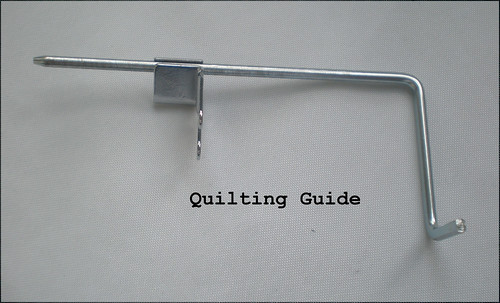
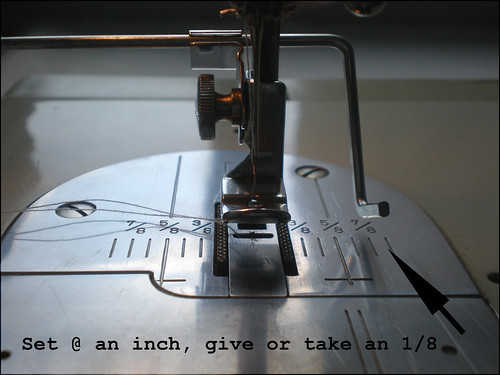
Quilting guide (Super helpful in keeping gathering stitches somewhat straight)


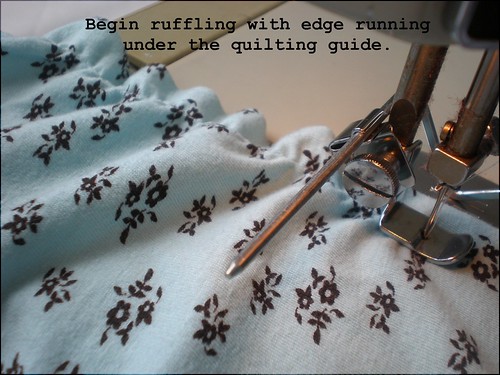
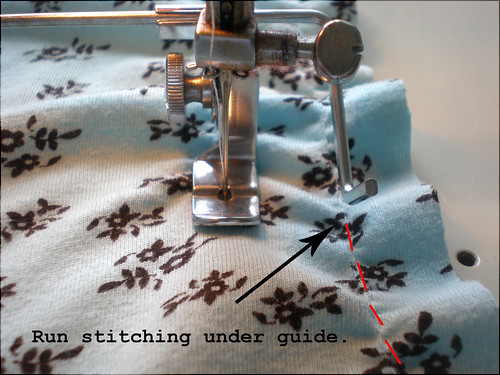
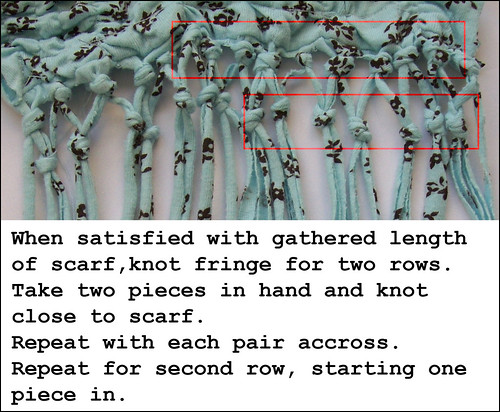
Gather in rows every inch (or less) across the width, with your stitches following the length of the fabric. Do not worry if your scarf starts to shorten on one side, you can always run more gathering stitches on the longer sides to shorten it up. You can also trim the fringe to give it the look of being evenly gathered.

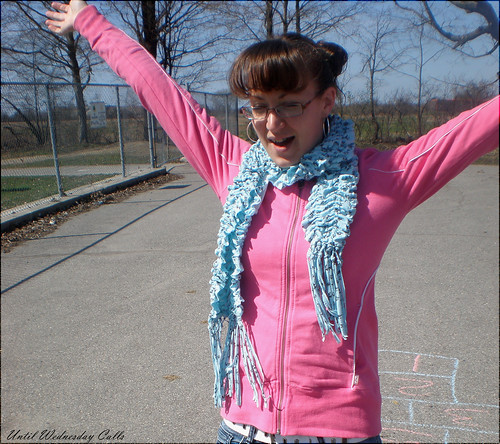
Action shot!!
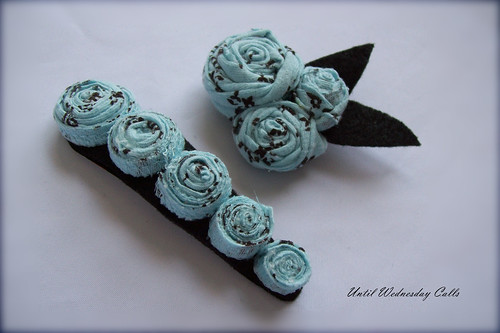
Oh, and if you have lots of leftover fabric like I did, you can create some matching accessories like this brooch and hair clip.
As always, proudly linking to the following link events.
Mother's Day Party @ Brown Paper Packages
Creative Share Wednesday @ The Trendy Treehouse
Idea Sharin' Wednesday @ Women Who Do It All
Whatever Goes Wednesday @ Someday Crafts


16 comments:
This was so clever! What a great idea! I'm going to be looking for a pair of pajama pants next time I go to the second hand store. Thanks for doing the tutorial.
Stop by and visit me sometime!
http://songberries.blogspot.com
It turned out great!! You're going to have everyone looking for jammy pants now *grin*.
Well done! I will have to try one of these. Sadly, I don't think any of my pjs are as pretty as yours!
Wow, that turned out great! I love the matching accessories! Thanks for sharing a great tutorial!
-Jill
love it!!!
What a pretty scarf!! And I'm lovin' the idea of using the quilting guide to get the rows of elastic thread straight.
I linked to your tutorial on Craft Gossip Sewing:
http://untilwednesdaycalls.blogspot.com/2010/04/how-to-ruffled-scarf-from-pajama-pants.html
--Anne
Thanx for sharing your "how-to" for this cute scarf!!
Nice looking scarf and professional looking tutorial. Congrats!
I'm in love with this scarf! I need to make one exactly like it!
Nice! I just made a scarf, too, out of old project scraps! http://adventuresindressmaking.blogspot.com/2010/04/silk-scrap-scarf.html
Wow...this is lovely Melissa! Fantastic job! You look really cute in it too, I must say. :o)
Must do this... so cute!
Oh I LOVE it :)
Now you can wear you pajamas all day :)
Now that's a first! Very cute!
I think I bookmarked this when you posted it last spring - I even bought a cute pair of thrifted pajama pants to use - and then forgot all about it. Now I've rediscovered it and think I definitely need to make this!
Post a Comment