Showing posts with label vintage sheets. Show all posts

Thursday, May 31, 2012

Sunshine Patchwork Skirt

It is no secret that Wednesday is my muse. From the moment I began creating since her birth. First scrapbooking and then sewing. So when I am in between creative bursts I look to her for inspiration. Last week I asked her what sort of skirt she would like next. She replied with a simple "Sunshine skirt."

At first I thought maybe I could do some applique work, use up some vintage ribbons and such but after a couple of hours of cutting and placing it.just.wouldn't.work. I decided to stop forcing it. Packed up the cut pieces and watched Sherlock. The next morning I woke up and was instantly inspired. I set to work after getting Wednesday off to school and by noon I had finished this little number. And so I present my second entry into the Crafterhours Skirt Week 2012 contest.

sunshine-skit-cropped
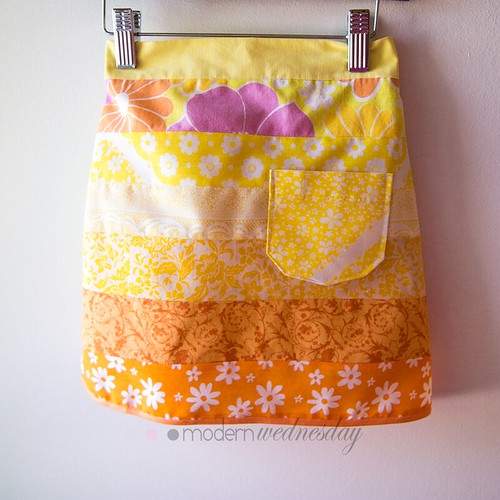
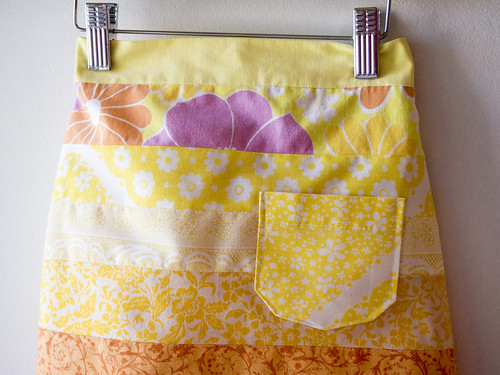
I call it the Sunshine Skirt. Made up of remnants from vintage sheets, new and vintage pillowcases and new(ish) yardage it is the sunniest skirt I have made.

sunshine-skirt
It fit Wednesday like a dream with room to both play and grow.

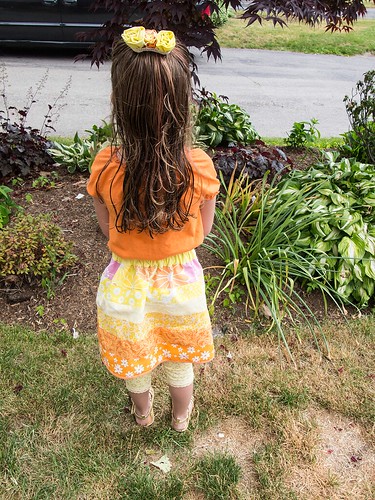
sunshine-skirt-back
I have finally figured out how to make the back of a skirt longer than the front to compensate for little girls belly's and bubble bums.

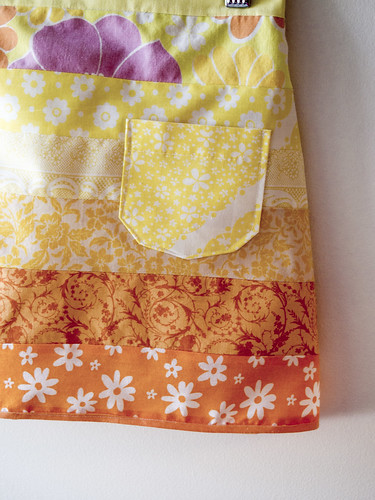
front right side detail
This is Wednesday's first skirt by me with a pocket. I would have liked to make it a bit more ornate but I think the simple approach works well with the skirt.

front top view
I have started to sew my waistbands with a 'stitch-in-the-ditch' quilting technique that lends itself well to clothing.

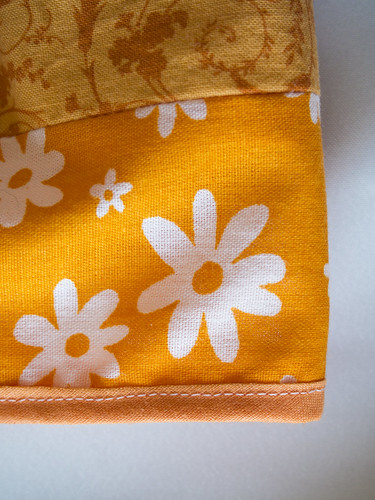
front right corner detail
I wasn't sure what I was doing at the hem (I usually do something ruffled.) so when I found some old orange bias tape I used it instead of hemming and losing length.

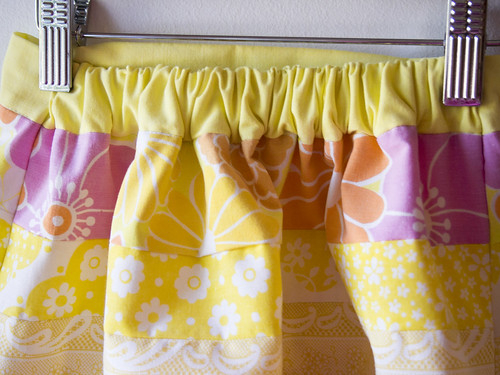
sunshine back waist detail
I love how the skirt has a fitted front panel and this elasticized back panel. Style and comfort in one little skirt.

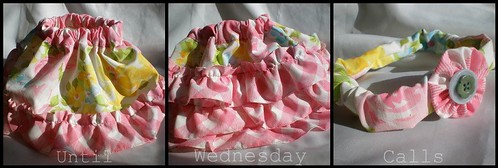
sunshine-hair-flowers
I could not resist making a matching hair piece. This is three gather flowers made from the scraps and glued to a French clip and finished with vintage lace.

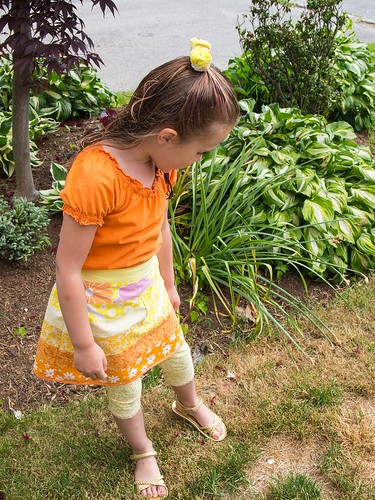
sunshine-playability
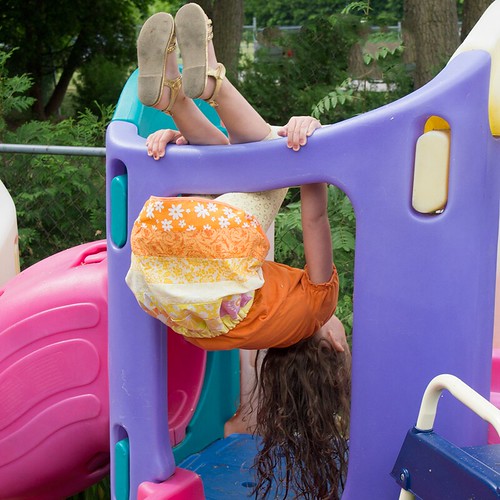
I'd say the skirt is comfortable to play in wouldn't you?

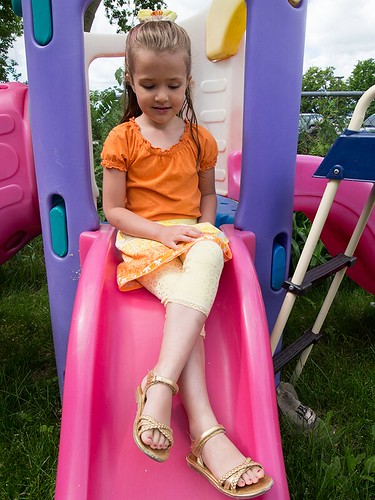
sunshine-skirt-lady
My little lady. ♥


crafterhours

♥Wish me luck! ♥

Monday, May 28, 2012

Ruffle Bum Vintage Sheet Skirt


crafterhours

Skirt Week is upon us again and it just so happens I have a few entries for this year's contest, so bear with me as I publish a couple of posts tooting my own horn.


Presenting the Vintage Sheet Ruffle Bum Skirt!


 Front view. This skirt is made from two of my very favourite vintage sheets in my stash.

 The skirt does have a soft lining with an attached aqua tulle peek-a-boo ruffle.

The back of the skirt has four rows ruffles that I double sided - narrow hemmed myself before ruffling.

 Back left close up.

Back right close up.

The skirt was inspired by this one I made two years ago for family member's little one.


Rufflebum Skirt

Sometimes you just can't let go of a good idea. <3 Wish me good luck!

Tuesday, March 13, 2012

My Creative Space...In Tatters

You can always tell where I am creatively by my bookmarks, pins, tumblr posts and flickr favourites. I am sure this stands for most people. Lately I have been on a big "using fabric scraps" kick. A few months ago I tore up many a vintage sheet and unused yardage thinking I would make a rainbow rag rug for Wednesday's play space. As soon as I tore it up I regretted the entire thing. The process of sewing all of those strips together and winding them in neat balls and then braiding them without tangling seemed impossible. So I packed up all the strips hoping I would find some simple projects to use them in. Only two obstacles lay in my way. The first was that most of the sheets and yardage were unwanted for a reason. The colours and patterns were either too drab or not inspiring enough to be used.  The other was the sheer volume of fabric, there was just so much of it. So the bags (and bags) of torn fabric strips just sat there taking up a lot of space.

So I googled and pinned and flickr'ed. Finally I have enough inspirational galleries that I will be done with my scraps quite soon. I have already used up about a quarter of them. Here are some photos to give an idea of what I have up to.

 This is what I am all about this week. The more poms the better!

 This basket took about three days. But it is huge. I made it to be a laundry basket or Wednesday's room. It is smaller than a big plastic laundry basket but big enough for a little girl's weekly laundry loads.
 The basket and pom poms are all made from vintage sheets.

 I spent a week wrapping plastic hangers from Wednesday's closet. Since we hang most o her clothing (PJs and tights excepted) She has a lot of hangers. I am only about half done, but I needed a break.
Some of the hangers I have even managed to embellish a little bit.

I want to share with you some of my favourite inspiration photos so that maybe you will be inspired as well.

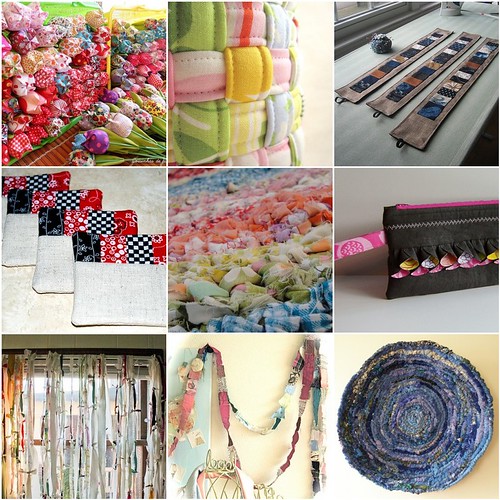
Most recently, I have created a Flickr gallery called Big Love For Small Scraps. Here is a sample of the photos.


Big Love or Small Scraps Mosaic

1. Para a semana..., 2. weaved fabric basket - detailed, 3. curtains 006, 4. Scrappy Fabric Coasters, 5. Rag Rug Completed, 6. Pretty Little Pouch Full View - Option 3, 7. Scrap Fabric Curtain 4, 8. vintage feel, 9. scrap coil


Over at Pinterest, I have a board called Scrap Not, Lest Ye Be Scrapped. It looks something like this.

There is approx 50 or 60 great links to check out. I made sure that every pin links back to the original post. So you shouldn't have to do any creative searching to find the tutorials (if there is one) to go with them.

So what have you been up to? What is inspiring you to create and search these days? Why don't you link up your creative space?

Monday, December 5, 2011

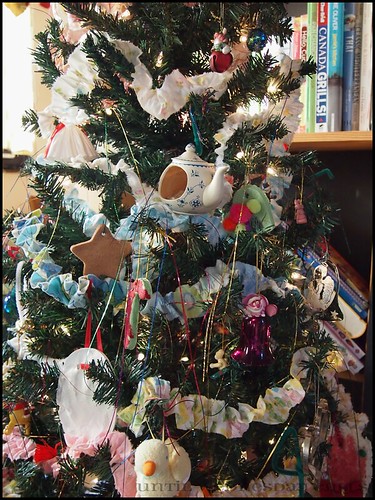
How To: Ruffled Christmas Garland

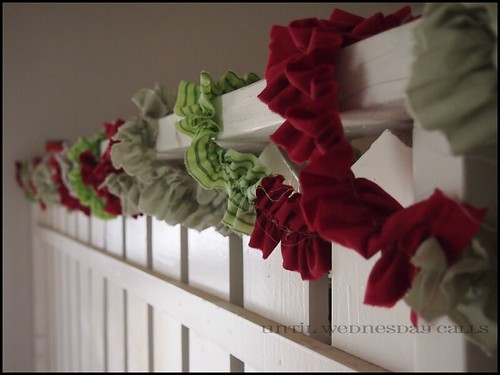
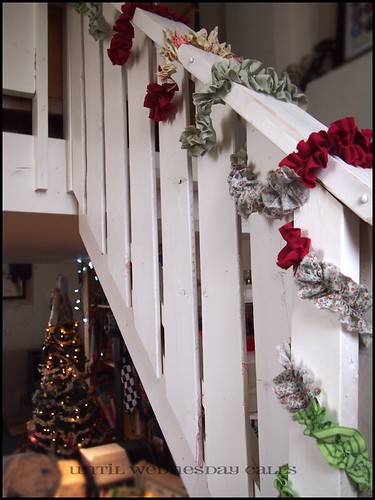
Christmas Garland On The Bannister

A couple months ago, I organized my vintage sheet collection. I made some mini fabric bolts from corrugated plastic. It looks great, but I had to trim a lot of large pieces of most of the sheets. I also decided to thin out the stash a little bit. My solution was a braided rag rug for Wednesday's play space. I have no idea what cold medicine I must have been on because as soon as I had torn up the sheets I realized that it was just too big of a job. So, now I had three large reusable shopping bags full of torn strips of vintage sheets and no way to use it all fast enough. Enter Christmas and my sewing machine ruffler foot.


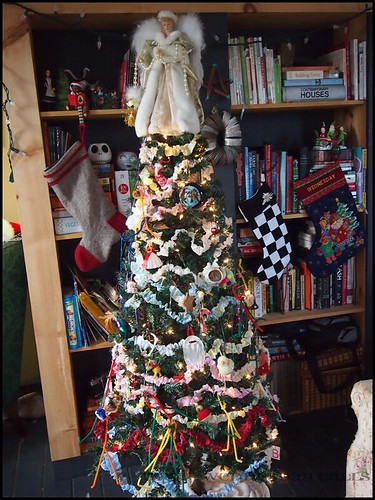
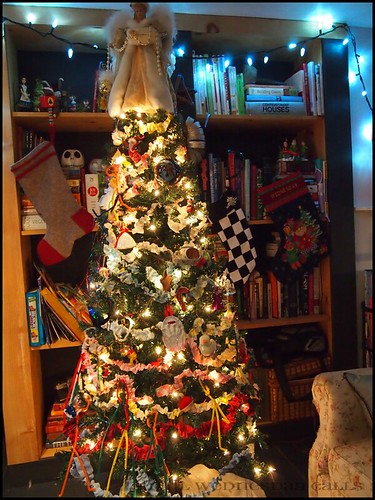
Ruffled Christmas Tree Garland

I managed to use up one out of three bags making a skinny garland for my tree and a fatter garland for my banister. I love them both. Captain Awesome called it "Country cute". I prefer chic to cute but I'll take what I can get! I almost feel silly for posting it as a tutorial but I took process photos and thought I would share. ***Authors Notes*** You could try this with burlap, or double up on your fabric, a skinny strip on top o a wide one. Or ribbons, have some spools of ribbon you haven't used in since last Christmas? Or scraps, the strips would be smaller of course but the variety and colour would be gorgeous!

Gather Ye Materials
Fabric (The longer the pieces the better, I used vintage bed sheets.)

Gather Ye Tools
Sewing machine
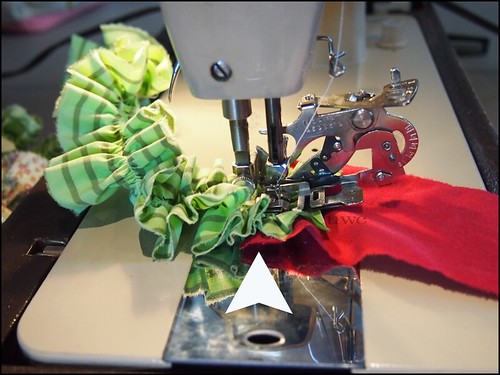
Ruffler foot (Gathering foot will work as well, it just produces a less full ruffle.)

Begin at the beginning...


Ruffled Christmas Tree Garland

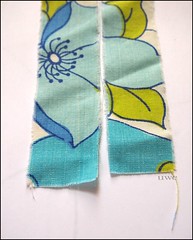
Step 1: Tear your fabric into strips. The easiest way to do this is to snip the fabric at regular intervals at one end and just tear down at each snip to the end of the fabric.


Ruffled Christmas Tree Garland

Step 2: With your ruffler foot set to rufle @ every stitch, and your stitch length set to the most per inch (I think mine was twenty?) feed the fabric into the ruffler foot a single layer at a time. This is just like using a serger.


Ruffled Christmas Tree Garland

Step 3: To join fabric pieces slide the next piece under the current piece with a half to full inch of overlap.


Ruffled Christmas Tree GarlandRuffled Christmas Tree Garland

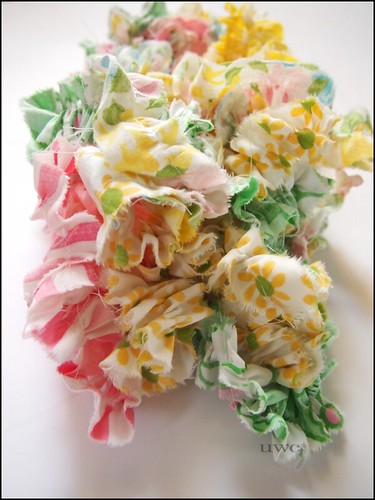
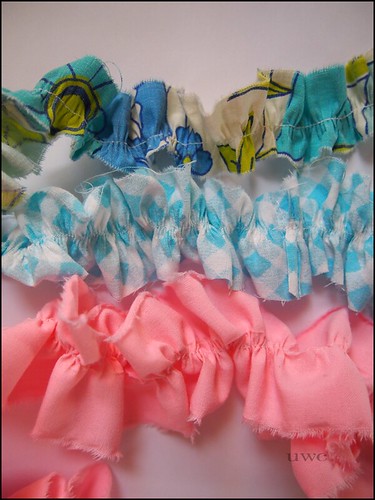
This is to show the different width and what the ruffle looks like. I used a skinny ruffle on my tree because it is a tiny tree (Artificial 6ft)I probably could have used a fuller ruffle but I am totally happy with how it turned out. I used a wider ruffle for my banister and also upped the fullness.

Ruffled Christmas Tree GarlandRuffled Christmas Tree Garland
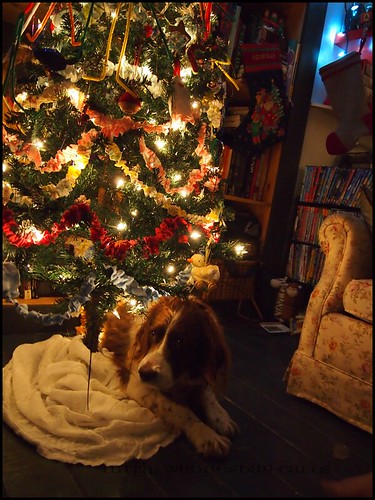
Shabby farmhouse chic by day and Country chic by night.
This our first Sweet family tree in the six(ish) years we have been together. Oh, we have had tree branches, and potted Norfolk pines, table top artificials and even giant firs (the fir was at my parents when we stayed with them upon moving back to Onatrio.) but this our first standard sized, lit up Christmas tree. At first I wanted a real one (Farmed trees are my eco choice) but the space we had to fit it was so narrow that really only a fake tree could fit. Also, our budget was nil so when this pre-lit 6ft went on sale at Canadian Tire I begged for harassed Ron jumped on it. The bonus is that it is small enough to be a second tree if we ever have a place that is big enough for two trees.
Christmas Garland On The Bannister

Christmas Garland On The Bannister

Nighttime-ruffles-and-Sweetie
Our very old Springer Spaniel, Sweetie Sweet. She is deaf and mostly blind and always looks like someone has beaten her or will be beating her soon. Emotionally high maintenance this dog.


Happy Holidays and of course happy crafting!

Saturday, December 3, 2011

How To: Scrap Fabric Flower Accessories


What seems like ages ago, I gave away some vintage sheet fat quarters and a fabric brooch I made as a bonus. I was asked by a couple ladies how I made it so I put making a tutorial for it on my to-do list but, as most things blog related last year it was de-prioritized. Well, since I began my fabric scrap management series, it was re-prioritized and finally completed! *yay* Would you like to make one (or five) o these little beauties? Sweet!

Gather ye materials
Fabric scraps cuts into circles (What size, how many different sizes and how many circles is dependent on what you want your flower to look like.) I like six per layer, sometimes eight and even five works.
Coordinating felt scraps (Or now that I think about it, leather and vinyl would look good too.)
Baubles for the center of the flowers (Buttons, brads, pins etc.)
Findings for the back (Brooch clips, alligator clips etc.)

Gather ye tools
Sewing machine (Not necessary but I don't enjoy hand sewing that is not purely decorative)
Needle and thread
Glue gun & glue sticks

Begin at the beginning...
Fabric Flower Tutorial Step 1 and 2
Step 1: Cut circle.
Step 2: Cut the circle in half.
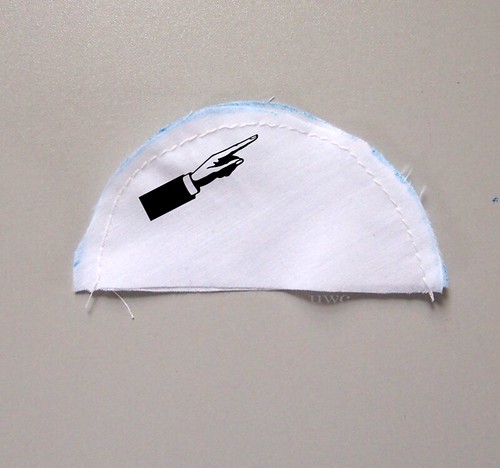
Fabric Flower Tutorial Step 3
Step 3: With right sides together, sew around curved edge.
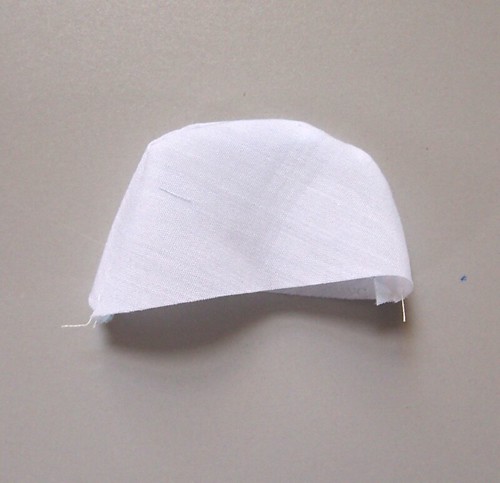
Fabric Flower Tutorial Step 4
Step 4: Turn right side out.

Fabric Flower Tutorial Step 5
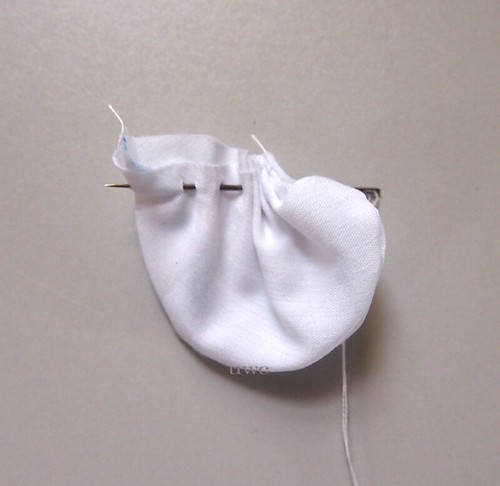
Step 5: Thread a needle, sew a loose running stitch along bottom of turned circles. Pull tightly.
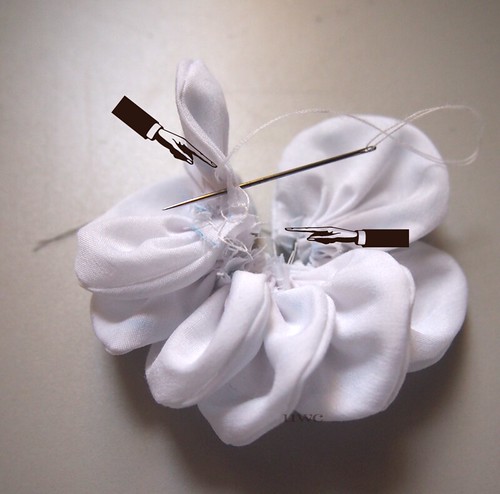
Fabric Flower Tutorial Step 6
Step 6: Continue threading petals onto needle and thread until you have enough petals or a single layer. Tie of after each petal if you find them unraveling to quickly. Tie after last petal before you tie two ends together.
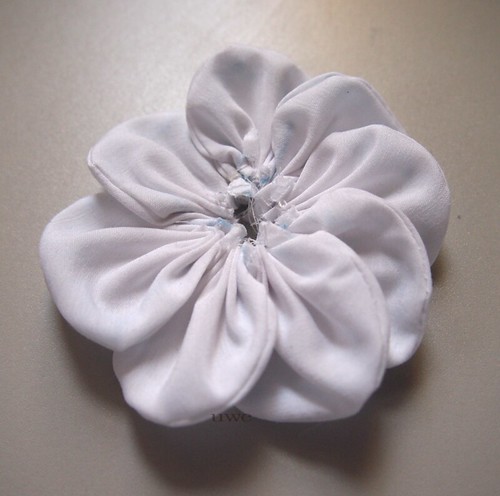
Fabric Flower Tutorial Step 7
Step 7: After you have tied the two ends together, arrange your petals. This might take a bit of shifting and such. I also stitched a few petals in place because I didn't like how they had gathered. You'll figure it out once you get playing with it.
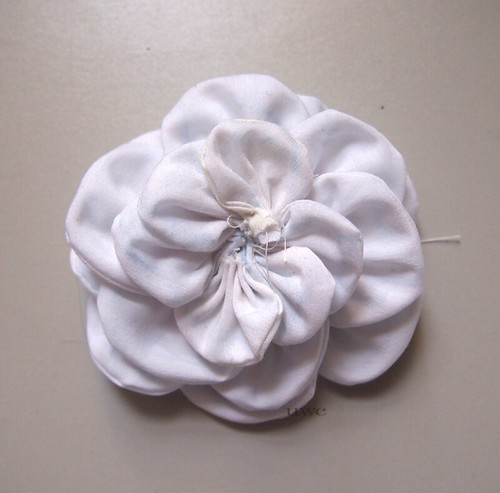
Fabric Flower Tutorial Step 8
Step 8: Repeat steps 1-7 until you have all the petals and layers you would like for one flower.
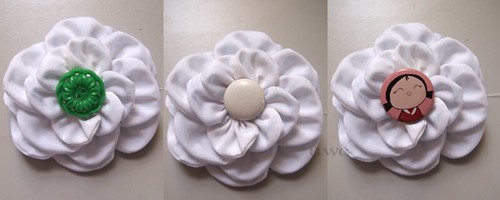
Fabric Flower Tutorial Step 9
Step 9: Play with the centers. Try a few things out. Here I tried a vintage green button, an extra large white brad and finally a button pin.
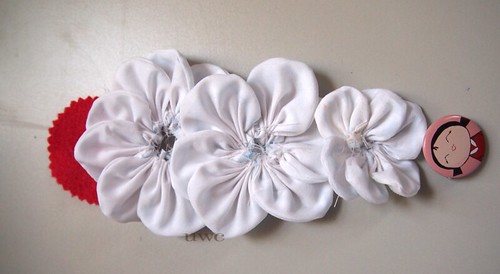
Fabric Flower Tutorial Step 10
Step 10: Cut a piece o felt for the back about a half inch smaller than the largest flower. Begin layering and gluing.
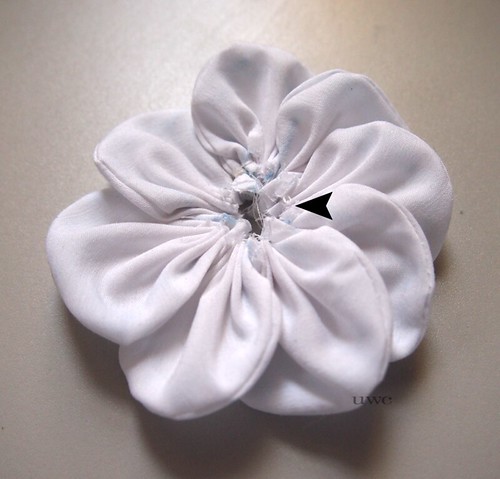
Fabric Flower Tutorial Step 11
Step 11: When gluing, add the smallest bit of hot glue (or tacky glue) around the center of each flower.
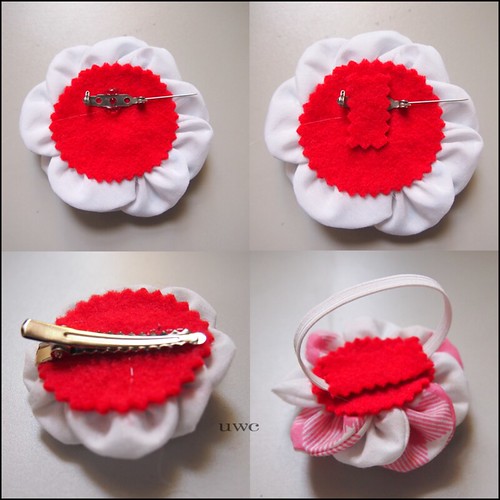
Fabric Flower Tutorial Step 12-14
Steps 12-14: Attach your desired accessory piece. If you use a brooch pin, I like to add a piece of felt to cover up the glue. But I also made one into a hair clip and one into a wrist corsage. And you're done!
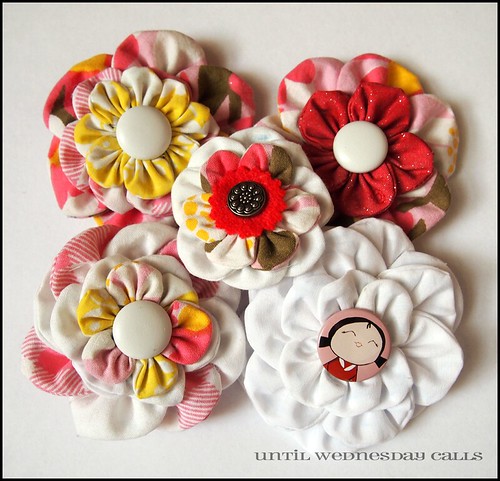
Fabric Flower Tutorial
Voila! Your new fabric scrap flower accessories! Now go make a billion for your little girl(s) and sister(s) and mama and grand mama and co-workers and BFFs and acquaintances!