
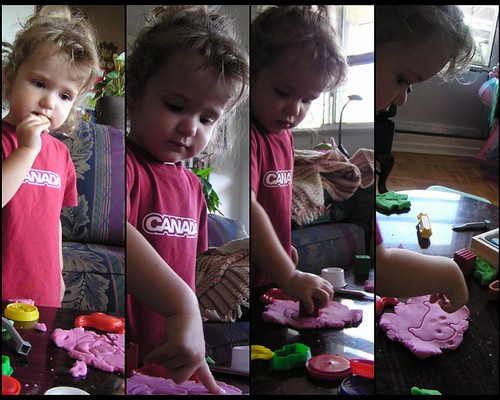
The next time I brought out the play dough she played with it for another hour. When I had to take her away from it for a nap she was just beside herself. She cried herself to sleep she was so upset. She eventually gave me a couple high fives, but she was weepy when she fell asleep. The third time I pulled out her play dough I found out the difference between the name brand Play-Doh and the cheap stuff. It was crusty and drying quicker and quicker with each use.
I found a homemade recipe that seemed easy enough. Remembering the homemade play dough recipes of my youth I was worried that it would not be vibrantly coloured enough for my tastes. I was very wrong. The recipe I made turned out quite pretty even using the super cheap food colouring I had on hand. I only made two colours because each recipe makes quite a bit but you could make every colour of the rainbow if you have the room to store it. It lasts quite a while too so you will be storing it for some time.
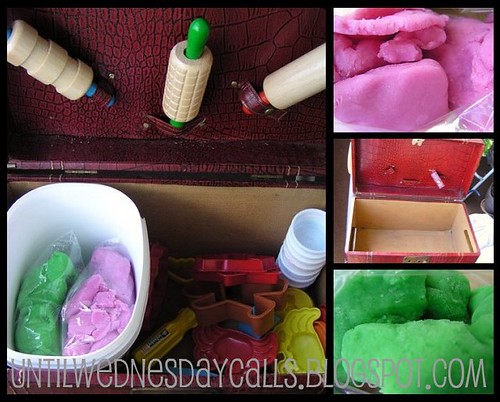
After I made the play dough I realized I needed a place to store it and the bit and bobs we had collected to play with the play dough. We had found a couple small sand molds from her beach toys, some plastic tools from a birthday goodie bag, Christmas cookie cutters not to mention the things to put in the play dough like shells, buttons and feathers! To house the fun stuff I converted an old train case I had laying around by conditioning the faux snakeskin with canola oil and giving the inside a good wipe down. Than I duped in the toys, put the dough into sandwich bags and then a plastic ice cream container and voila! You have a portable play dough station.
She plays with these toys at least three times a day. I think right now she is on her fourth time pulling it out. I put it away in between meals and other childish pursuits to keep the dough from drying out. The dough is great though, even if it does dry a bit you just knead it a couple seconds and you're good.
Also, the train case latch is still in working order and she has not figured out how to open it so she can only play with the play dough when I give the ok. Which is every time as long as I have had at least one cup of coffee in the morning. And now for the recipe. I got this from a book of eco-friendly kids crafts called Green Crafts for Children by Emma Hardy published by Cico Books London & New York.
1 cup white flour
1/2 cup salt
2 tablespoon cream of tartar (find it in the spice section)
1 tablespoon oil
1 cup water
food coloring
Mix first 4 ingredients in a pan. Add food colouring to water and mix. Add water mixture to pan and mix well. Cook over medium heat, stirring constantly, for 3 – 5 minutes. Dough will become difficult to stir and form a “clump”. Remove from stove and knead for 5 minutes
This was so much fun. I stopped at two colours because it makes a lot of dough, but if you have lots of children to entertain you could keep going, the colour possibilities are endless.
Have fun sculpting!


