Thursday, March 29, 2012

Wednesday on Wednesday (or Thursday)

It has been ages since I shared some photos of Wednesday. (Since pre-Christmas I believe.) Good and bad excuses aside, I have some wonderful photos to share today. Last week we had some seriously unseasonable and amazing weather here in South Eastern Ontario. It was summer weather. We were out in shorts, and flip flops for the better part of the week. Before the weather could return to the seasonal cold and wet temperatures, I managed to whisk Wednesday off to the park for some sunshine, fun and photos.


Now it is back to raincoats, boots and mittens. What a glorious week it was though. I hope your spring is coming up daffodils!

Tuesday, March 27, 2012

How To : Recycled Denim Coil Basket

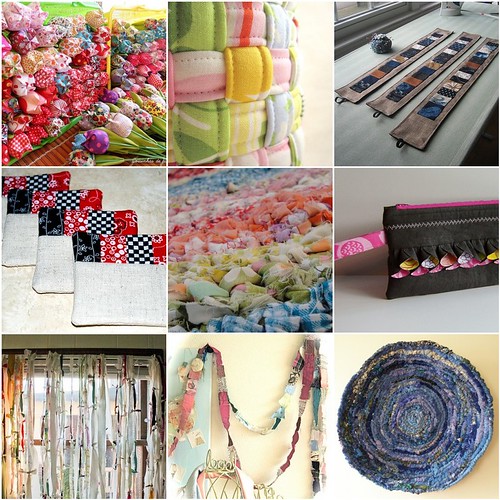
I am slowly making my way back to crafting and posting...lately I have been mostly crafting and I am ok with that. Must be the weather?  Well, this little number was inspired by two completely separate projects. The first being the coiled basket I made from torn vintage sheets and a pair of jeans I refashioned.  I thought enough ahead to take process photos, so I have a tutorial for you today! I haven't had one since before Christmas, wow some holiday eh?
Behold the scrap denim drawer. A collection of remnants from past projects and full pieces I have yet to utilize including two pairs of untouched jeans, a jacket and a mini skirt. I took out a bag of inseams and cuffs I had separated and began the project. Within just a couple of hours I had this basket, which has a seven inch diameter at the base and a twelve inch diameter at the top. The basket is nine inches high.

To make your own you will need:
Inseams and hems from several pairs of jeans
Waistband from one pair of jeans for handles (optional)
Back pocket from one pair of jeans (also optional)
Hot glue gun and a couple sticks of glue
Sewing machine
Denim needles (or size 14) more than two and denim has a tendency to warp needles.
One large spool of thread + two or three matching wound bobbins

Begin at the beginning...

Begin by taking a bottom hem piece and coiling it around itself. Adding hot glue along the seam as you roll. Don'y mind if the glue seeps out a bit as the arrows are showing it is hardly noticeable.
Continue adding pieces to your coil until it is a size you like (or you run out of hem pieces like I did.) As you can see I chose to keep the lumpier pieces where the hem and the seams met. You can leave them out for a smoother coil but I found by staggering them around the circle it all evened out in the end.
When you have finished coiling your base, add a piece of denim that is taller than the coils. Here I used a hem from a pair of men's shorts I had. But you can use a piece of denim cut to size. It is just to give your basket wall coils something to attach to.
Tip up your base so that the taller piece you added to the outside meets up with inseam piece under your presser foot exactly in the middle. Close up pictured below.
See how the base is under the presser foot as well as the first inseam piece? You need them to meet in the middle because you are going to use your widest zig zag stitch to join them together. Back stitch a couple stitches and big stitching.
When you have sewn your first coil around the base you will need to CONTINUOUSLY stitch up to the second row. Simply move your coil so that it crosses the bottom and begins a second row on its own.
When it is time to add another piece of inseam you just slide it under your foot and continue stitching. You might have to fiddle with it a little bit. And sometimes it might not line up perfectly, but for me it added to the charm. YOu might just need to go slower than I did. (I got more and more excited the closer I got to the end of the project.)
See? Holes. But I was okay with them. What I wasn't okay with was big holes between coil rows. So when I was done the basket I went back and sewed up any places that my zig zag stitched missed. (Glue would also work as there was one row that broke two needles on me before I just accepted it and moved on.)
For the handles I just snipped a couple pieces from a waistband and straight stitched them on. (The machine did not enjoy trying to zig zag stitch throw two+ layers of denim)
Because I wasn't going to sew this pocket on, I wanted to give it some stitch detail first. I like the royal blue stitching against the bright black denim.
Choose a side for your pocket (I chose the one that had one too many iffy spots) and affix with hot glue.
You are done. Now fill it with stuff and enjoy!

If you have questions please feel free to leave it in the comment section an I will answer it ASAP.
Thanks for stooping by!

Tuesday, March 13, 2012

My Creative Space...In Tatters

You can always tell where I am creatively by my bookmarks, pins, tumblr posts and flickr favourites. I am sure this stands for most people. Lately I have been on a big "using fabric scraps" kick. A few months ago I tore up many a vintage sheet and unused yardage thinking I would make a rainbow rag rug for Wednesday's play space. As soon as I tore it up I regretted the entire thing. The process of sewing all of those strips together and winding them in neat balls and then braiding them without tangling seemed impossible. So I packed up all the strips hoping I would find some simple projects to use them in. Only two obstacles lay in my way. The first was that most of the sheets and yardage were unwanted for a reason. The colours and patterns were either too drab or not inspiring enough to be used.  The other was the sheer volume of fabric, there was just so much of it. So the bags (and bags) of torn fabric strips just sat there taking up a lot of space.

So I googled and pinned and flickr'ed. Finally I have enough inspirational galleries that I will be done with my scraps quite soon. I have already used up about a quarter of them. Here are some photos to give an idea of what I have up to.

 This is what I am all about this week. The more poms the better!

 This basket took about three days. But it is huge. I made it to be a laundry basket or Wednesday's room. It is smaller than a big plastic laundry basket but big enough for a little girl's weekly laundry loads.
 The basket and pom poms are all made from vintage sheets.

 I spent a week wrapping plastic hangers from Wednesday's closet. Since we hang most o her clothing (PJs and tights excepted) She has a lot of hangers. I am only about half done, but I needed a break.
Some of the hangers I have even managed to embellish a little bit.

I want to share with you some of my favourite inspiration photos so that maybe you will be inspired as well.

Most recently, I have created a Flickr gallery called Big Love For Small Scraps. Here is a sample of the photos.


Big Love or Small Scraps Mosaic

1. Para a semana..., 2. weaved fabric basket - detailed, 3. curtains 006, 4. Scrappy Fabric Coasters, 5. Rag Rug Completed, 6. Pretty Little Pouch Full View - Option 3, 7. Scrap Fabric Curtain 4, 8. vintage feel, 9. scrap coil


Over at Pinterest, I have a board called Scrap Not, Lest Ye Be Scrapped. It looks something like this.

There is approx 50 or 60 great links to check out. I made sure that every pin links back to the original post. So you shouldn't have to do any creative searching to find the tutorials (if there is one) to go with them.

So what have you been up to? What is inspiring you to create and search these days? Why don't you link up your creative space?

Friday, March 2, 2012

Return from the...well super busy!

Wow! It has been awhile hasn't it? Well, in case anyone has been worried, nothing bad had befallen me or my family. In fact just the opposite. SO much good and business I just decided to extend my Christmas vacation from craft blogging.  Mostly because after Christmas I hadn't been crafting much. Much. I did in fact move to a house with three times the space (meaning three times the bedrooms.) We also have been three times as social now that we live in town instead of the boonies. I have also been cooking three times as much. So yes, I have been 'crafty' just not in all the usual ways.

bella-001halloween 2011-003
happy go lucky-001Happy Go Lucky

I have been creative though. I have finished a couple more pages of Wednesday's 2011 scrapbook. (With any luck I ill be done in time to create Shutterfly books for the grandmothers.) I attempted some basket making (sewing and weaving). And recently, I made a fantastic outfit for Wednesday. (My first in way too long.) Check it out!

Wednesday has really taken to being photographed. She'll do all sorts of poses and facial expressions for me. It is super nice when I want to take photos of her modelling her new threads.
 The t-shirt was made by resizing some google images and printing them onto photo transfer paper. Easy peazy lemon squeezy. You can email me for the word document if you like.
 The skirt is basically a very ruffly version of Made's Market Skirt. Tutorial here. 
 Skulls and pink bows. Very Monster Chic.
The fun was in the details though. I added a pleated ruffle to the main skirt body (a thrifted bedsheet) and a double chiffon ruffle to the bottom.
Wednesday's latest obsession is Monster High dolls. So much so that we have had to use these dolls (They do not come cheap!) as a lesson in chores and money saving for Wednesday. So far so good. She knows that we will not buy her one but she is more than welcome to empty her piggy bank of hard earned money for one. She takes care of the dog and cat and keeps her room tidy(ish). So far so good.

I do have a new studio, and two new bedrooms to decorate. I am hoping to get Wednesday's done sooner rather than later. With it's pink walls it is half way there lol. Vintage Strawberry Shortcake is my theme. Stay tuned for more photos of of that and my studio's progress!

Cheers!
Melissa