Sunday, October 17, 2010

Sew What! Holidays! Invisible Edition!

sew what holiday button large

Soo...as you can see I have nothing to reveal. Zip. Zilch. Nada. Bupkiss! I have a few excuses but really it comes down to sewers block. Until today. But today I had a morning of laundry and an afternoon of sunshine and fresh air at a family member's birthday party. I was so inspired today though that I am hoping to have two pieces to reveal by Thursday, maybe sooner!! Fret not though, you can always ooooh and aaaah at the holiday outfit Cynthia created.
Sewing Dork Button


For those of you who need a recap on the projects and how to submit them here you go:
Week one : A gift for him *bonus craft: holiday garland
Week two : A holiday Outfit

Week three: A stocking or toy or both!

Week four: An ornament for the tree


The challenges will still be posted a week prior to a showcase for each project on Sundays. And for those of you worried that this bit of Christmas sewing might interfere with your other holiday prep such as Halloween and Thanksgiving, there will be a two week intermission starting October twenty fourth (So everyone has a week prep time for Halloween) and ending November seventh (just in time for American Thanksgiving.)

Also, reader submissions will still be taken by:
  1. Comments with links to blog posts
  2. Emailed photos 
  3. Uploading them to share in the Flickr Sewing Dork Showcase group. It is super fun to browse through all the great ideas and submissions!
I hope that was easy to decipher. If you have any questions or concerns please do not hesitate to contact me via the button on my sidebar.

For those of you cool cats who would like to share the fabulous button on your blogs and posts, just copy and paste the code int he text box. Cheers!

Friday, October 15, 2010

Fabulous Five! Plastic Bottle Edition

Friday is here again folks! Another week another dollar and now we get to have some fun! And to help you through until that quitting time whistle blows here is this week's Fabulous Five!

So, a couple weeks ago I came across this gorgeous bit of melted plastic at Aunt Peaches (One of my new favourite blogs) she calls it "Swiss Candy Jewlery" and I think it is quite aptly named. It is made out of plastic juice glasses. Visit her blog for the full tutorial. Go for the crafts, stay for the back stories. You'll understand when you visit if you haven't already.

Which got me to wondering, how many other fabulous recycled plastic projects are out there? Let me tell you, it was not hard to find at least five but it sure was hard to narrow it down to five!

When I typed in "recycled plastic bottle crafts" to Google and clicked on images, one of the first images to grab my attention was a photo of recycled plastic bottle beads. It took some searching for a tutorial because the original photo was for a dead link. I did manage to find a couple great tutorials though. This one from Dis.Ar.Ray @ Cut Out & Keep seems easy to follow. And for anyone who is deterred by the need for a heat embossing gun I read in a few comment sections that lighters/candles and stove burners work well too. This is my new motivation to buy the rainbow pack of Sharpies I have been eying for a year. Bonus points for those of you that know what PLUR means! :)

Okay, jewlery is nice but how about this absolutely stunning chandelier made from what looks like a metal hoop, some seventy billion clear bottle bottoms and a heck of a lot of patience. Made by Michelle Brand it just screams pretty doesn't it? The bottle bottoms remind me of flowers and the transparency lends to a more expensive acrylic don't you think?

And if you think the chandelier was a labour of love, how about this recycled bottle greenhouse?! The plans are located here (in PDF form)and are made available from REAP, an organization in Scotland that works for sustainable development. via New World Geek. (The blog is on a haitus but the archived posts seem to be worth checking out)I think this would be a brilliant project for a family, or local community garden or school etc. Maybe even me next spring!

Speaking of gardens, how about this uber-downscaled version! Hanging bottles for an upside down garden on your balcony or fire-escape. These ones are made by Mike Lieberman AKA The Urban Organic Gardener. His website is full of super posts about gardening on your city balcony in particular was this tutorial on how to create a hanging garden from 2 litre plastic bottles. YOu can dress them up with paint or coloured tape or leave them with their labels to accentuate your green living!

I know that technically that is five but we are counting Aunt Peaches Swiss candy as the inspiration for the post and so we get to showcase one more groovy project.
Super simple, super sweet and for the kiddos is this project for Discovery Bottles from Disney's Family Fun site. I love the look of these as well as the simplicity. The only thing I would recommend is to use a silicone based sealant instead of hot glue (Between the bottle and cap) and maybe a drop or three of tea tree oil to keep the water fresher longer? Seriously though water and sparkles, does it get any better? You could totally turn this into an I Spy game with a card attached to the bottle with pictures (for pre-readers) or words (for school agers) with a list of things to find.

Phew! All done, but I think the new feature is true to it's title yes? Those were some pretty fabulous ways to re-use plastic bottles yes? I think so too. I also think that Fabulous five will be a bi-weekly series. This gives me lots of time to sit down for one of these marathon linking posts!

And with that, I bid you adieu. ♥
Thursday, October 14, 2010

How To : Denim Tool Roll

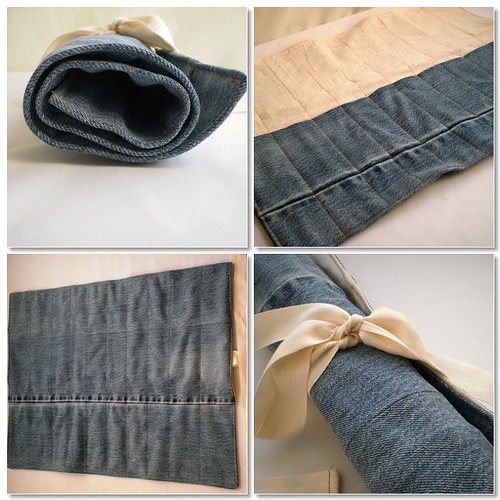
As promised, the denim tool roll tutorial! Sorry for taking so long but I swear I have not stopped for the last two weeks! Now, I know there are a lot of crayon roll type tutorials out there, but I didn't use one for this. And really this is probably more simple than a crayon roll because there is not interfacing or seam binding!


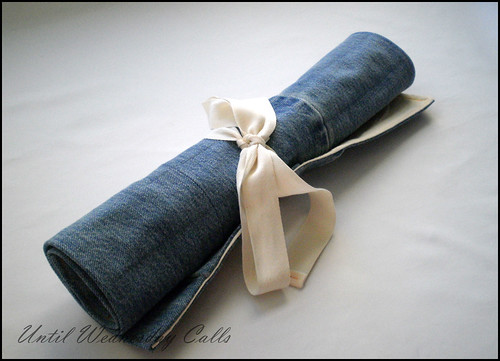
Finshed rolled tied 1

Materials
1 pair of jeans (Or just the bottom 21" of two legs)
1 piece of fabric 15x20" (This is the canvas I used)
1 yard ribbon/twill tape

Modus Operandi


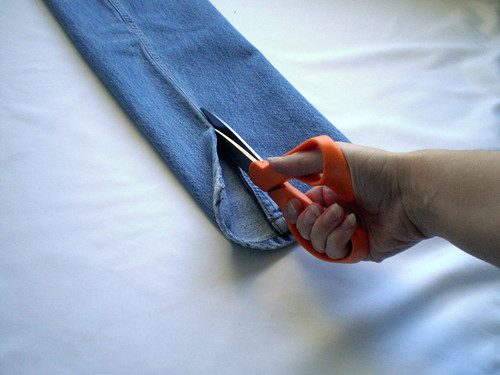
Cut seams
Cut down the inside seam of two legs cut to twenty one inches.

Square up
Square your leg pieces to the inside seam.

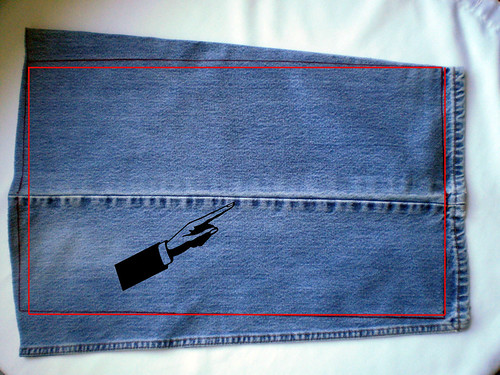
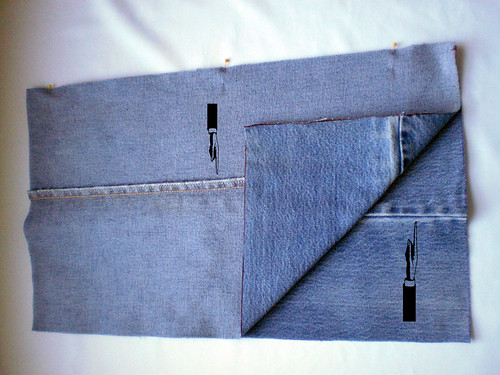
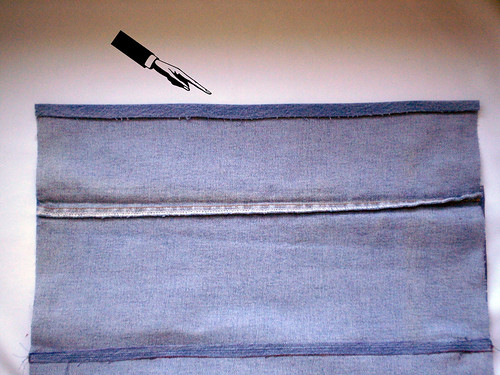
Join pieces
Join pieces. But do this so one small piece meets one big piece. I tried to make it clear with the photo.

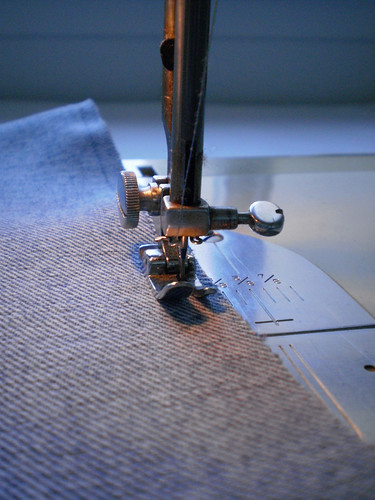
Sew pieces
Join pieces with a 3/8" seam.

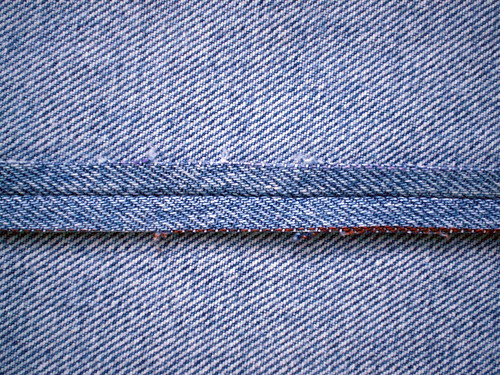
Press seams flat
Press seams flat.

Sew down seams.
Sew down seams.

Fold and press
Fold and press bottom about a half inch.

Pin
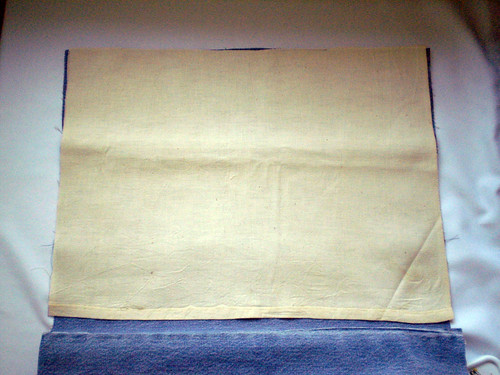
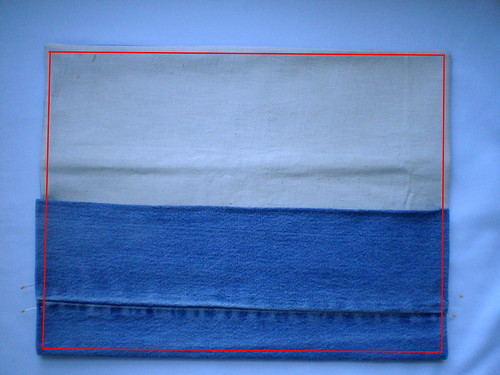
Pin canvas piece to top. This should be approx 15x20".

Sew canvas
Sew canvas around sides and top. The bottom needn't be sewn to the denim but feel free to give the canvas a quick hem before pinning. (I cut my piece from the bottom of the curtain to this step was done for me.

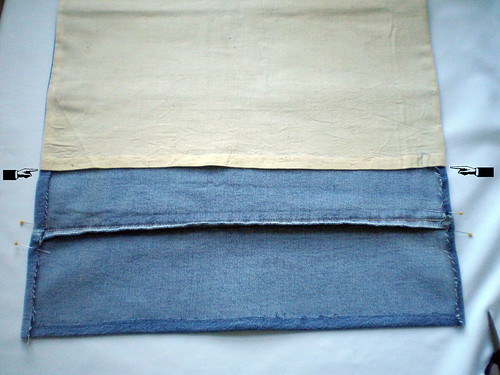
turn out
Turn out. Now press the denim sides in to line up with the turned canvas.

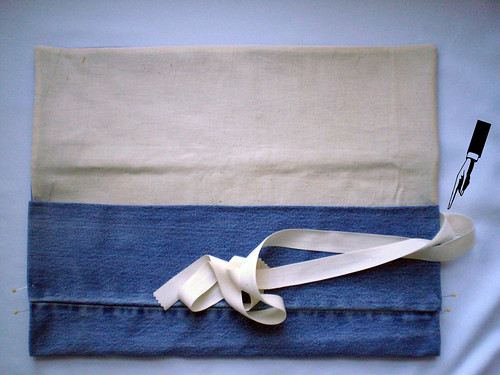
Tie strap
Fold up the denim and add your tie strap. I used cotton twill tape. You can pin at this stage but it is a lot of fabric and I find if you go slow, denim doesn't need to be pinned.

Top Stitch perimetre
Sew around the entire perimetre. Don't forget to back stitch a few stitches where the denim meets the canvas.

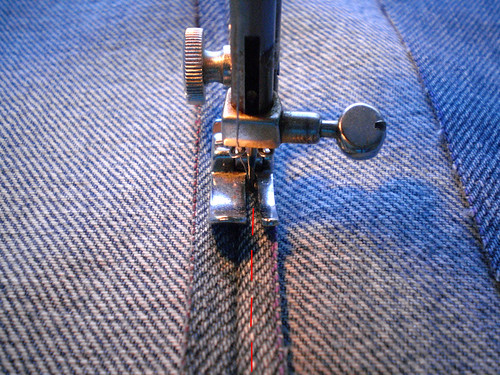
mark and quilt.
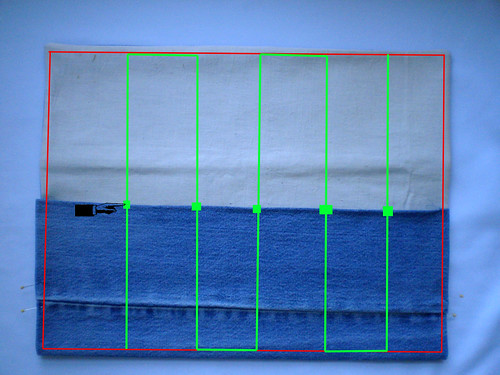
Once you have sewn the perimetre you can either mark with disappearing marker the lines you want to sew along to create the pockets or you can use a quilting guide set to the desired pocket width. I used a marker and marked out two 2.25" pockets on the ends and six 1.75" pockets in the middle. It made it super easy to sew super quick. You can do this in one continuous line starting at the bottom of one end and ending at the top of the other end. Don't forget to back stitch where the denim meets the canvas.

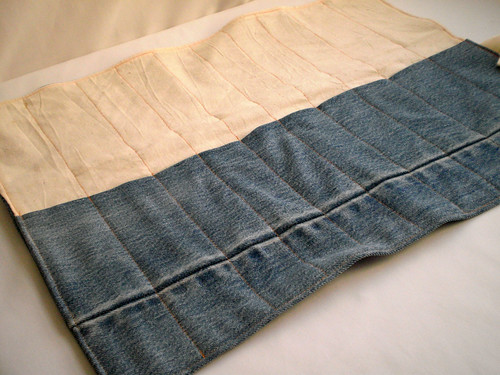
Inside finished
Ta-daaa! Your finished your manly toll roll!

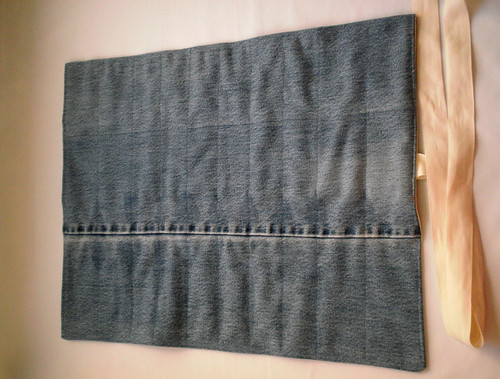
Reverse finished
If you use denim coloured thread in your bobbin, your quilting is barely discernible!

Denim Tool Roll
Now go put your brushes or knitting needles or scissors in it before you change your mind and give it to a deserving man in your life!

I hope you enjoyed this how to! I hope you make your own! I hope you show me yours! I hope you come back for more great projects! Cheers!

Sew What! Holidays Reader Showcase!

Good morning good morning! determined to get stuff done today this is the first of two Sew What! Holidays posts today. This one is the readers showcase and this afternoon there will be a tutorial for the tool roll I made last week. :) Last week the challenge was to create a "Gift for Him" now, let us see what you came up with!
These gorgeous lunch bags were made by my partner in crime Cynthia, The Sewing Dork. The one on your left is for Mr. Dork. The two fabulous Ikea fabric bags are for her. So smart looking! If you would like to make your own fabric lunch bags visit this post at her blog for a tutorial.


Sew What Holiday 2010 - 2


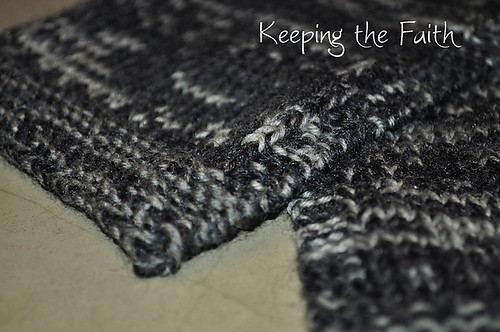
MMm, this hand knit bamboo and wool scarf made by Angela pea of Keeping The faith looks so warm and cozy! I bet her son will love it. Although technically not sewn, it is still a gift handmade with love and totally counts for the Sew What! Holidays sew along. (Maybe next year we'll do a craft along?!) If you would like to knit one yourself you can visit her blog to get the how-to!

Amy Jane made these fabulous pj pants for her boyfriend. She says she is changing out the paw print drawstring but I love it!

Thanks so much for playing along everyone! For those of you that have not submitted projects yet, do not despair. The time time lines are not made of concrete. If you need some extra time take it! We'll show off your stuff the following week (Heck even month if need be!) So get back to those holiday outfits I want to see some sparkle!

For those of you who need a recap on the projects and how to submit them here you go:

Week one : A gift for him *bonus craft: holiday garland
Week two : A holiday Outfit

Week three: A stocking or toy or both!

Week four: An ornament for the tree


The challenges will still be posted a week prior to a showcase for each project on Sundays. And for those of you worried that this bit of Christmas sewing might interfere with your other holiday prep such as Halloween and Thanksgiving, there will be a two week intermission starting October twenty fourth (So everyone has a week prep time for Halloween) and ending November seventh (just in time for American Thanksgiving.)

Also, reader submissions will still be taken by:
  1. Comments with links to blog posts
  2. Emailed photos 
  3. Uploading them to share in the Flickr Sewing Dork Showcase group. It is super fun to browse through all the great ideas and submissions!
I hope that was easy to decipher. If you have any questions or concerns please do not hesitate to contact me via the button on my sidebar.

For those of you cool cats who would like to share the fabulous button on your blogs and posts, just copy and paste the code int he text box. Cheers!


Wednesday, October 13, 2010

Wednesday on Wednesday

I know this is a little late but it has been a busy day here! I do have a couple pictures to share though. Wednesday is big on avoiding the camera lately (I think it is a form of rebellion.) But, when she isn't looking at me she is usually being super cute with Daddy!

For our fifth anniversary The Mister took us for a gorgeous fall drive to Ottawa. You do not get prettier than Ontario in the fall and this trip was no exception. I haven't the pics I wanted due to only having a point and shoot and a sleeping  babe but the memories are there forever. Here are a few pics I did manage to take of Wednesday at some of the places we visited.


throwing rocks bw
Throwing rocks in the Ottawa River at Brittania Beach.

Dinosaurs

Hanging out with some Dinosaurs at the Canadian Museum of Nature.

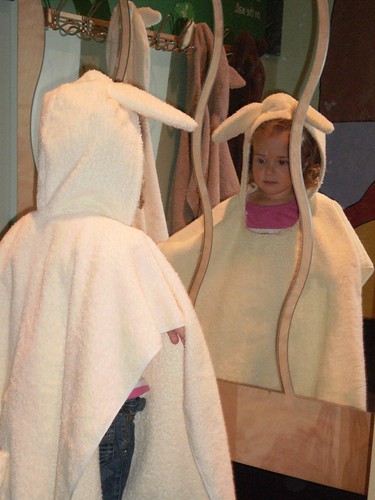
Cute bunny!
Dressing up as a bunny in one of the kids areas at the museum.
Wednesday's favourite thing about the trip naturally was the dinosaurs. She loves dinosaurs, plays with hers daily so I was so happy as a parent to be able to do that for her. I can't wait to take her back again or even to another science museum with super fun interactive exhibits. For more pictures of our trip that include some great scenery, fabulous dinosaur skeletons (even a blue whale skeleton) and random family schmoopiness click here to be taken to the Flickr photoset.

Pink Purse Tutorial at Every Day Mom Ideas

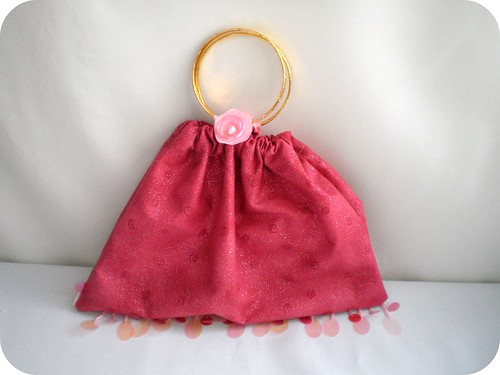
Pink Purse

Remember this purse from the Pretty in Pink giveaway? Well if you liked it so much you want to make a version of it yourself you can! I made up a tutorial and am sharing it over at Everyday Mom Ideas. You have to scroll down past some sticky posts but it is there in all it's pink glory! In this version I traded the bows for some fun trim and a couple small flowers and the bamboo for gold toned bangles. But the purse construction is indeed the same! Be sure to stop by and check it out and leave those comments we all love!

Wednesday on Wednesday will return this afternoon, I have yet to upload the photos from our trip, but I am excited to share them with you!

Monday, October 11, 2010

Canadian Thanksgiving!

trees
Just a taste of the colours outside our doors right now.
Today is a Thanksgiving here in the Great White North and so My Crafty Weekend will return next Monday (October 18th).

We are taking off for a day or two. This is the most brilliant time to be Canadian. The autumnal landscape is breath taking. We'll be driving the Algonquin route for a day and ending up in Ottawa. It will most likely be a two day trip. I will do my best to keep things running but if not, I'll power play catch up when we get back.

Slugzilla
We are thankful for the time and opportunity to do things like chat with slugs. Of course I amthankful for Wednesday and all her gifts, my incredible partner in life and my super human health but really I just can't believe  I get to spend every day doing things like hanging out with Wednesday and slugs (or worms or grasshoppers). What are you thankful for this year?

Sunday, October 10, 2010

Sew What! Holidays Challenge One Reveal!

Challenge One : Gift For Him
So, true to form I made this one right before all my time was up. Cynthia emailed me asking what time I was going to make this post and I hadn't even made the project yet! But, I got down to business and thanks to both nap time and Daddy distractions I got it done!

Finshed rolled tied 1
It started off as an idea for the spring when I was doing my Denim-Stravaganza. But because The Mister kept forgetting ot bring me home the wrenches for proper measurement it never did get made. Well, when Cynthia suggested a "gift for him" as the first idea I thought she was a genius. But I also thought that now was the time to make the tool roll. Again I waited and waited for the wrenches. Finally two days before the reveal I just went ahead and made it. I even took process photos for a tutorial this Tuesday.

Denim Tool Roll

I made the roll from two legs of jeans and a chunk of upcycled canvas. (I bought it at a charity shop and I am pretty sure it was a curtain panel in it's former life.) With no real plan except the basic dimensions (Which I gleaned from a tool catalogue.) I made this in about two hours. I love it. I will be making more. Just think of all the paint brushes, art pencils, knitting needles and crochet hooks that need storing! Also, scissors I have a nice scissor collection and I think this is a great way to both store them and have (all of) them ready when I need them.


To see what Cynthia The Sewing Dork made for a man in her life click on the button below!">Sewing Dork Button
If you are playing along, all you need to do to submit your creations is one of the following:
  1. Upload a picture to your flickr account and add it to The Sewing Dork Showcase
  2. Leave a link in a comment on this blog or at The Sewing Dork's
  3. Email (I have a button on my sidebar) us with the photos or a link to the photos or blog post.
We will be doing reader submission posts through the next month and a half. And please Do Not Fret if you can't make a deadline, we are happy to share your work whenever you finish it. I think I showed a readers work a full month after the last edition.

Okay, now to reveal this week's challenge! A Holiday Outfit!

This outfit can be for anyone! You, your little one or your mister, it is up to you to whom you dedicate your time to.
Also, as a reader asked me earlier, it can also be for Halloween. We are not rule crazy here. If making a costume fits better into your schedule than something sparkly for Christmas or New Years by all means have at 'er!
I do believe that is all she wrote folks! So tune in on Tuesday to find out how to make the Denim Tool Roll pictured above, and come back on Thursday for the first Reader Submission Showcase! And, if you don;t have one, would like one, and feel like sporting one on your blog here is a button just for those purposes! (Well that and they are just fun to make!)


Thursday, October 7, 2010

Recipe : Fabulous Pumpkin Bread

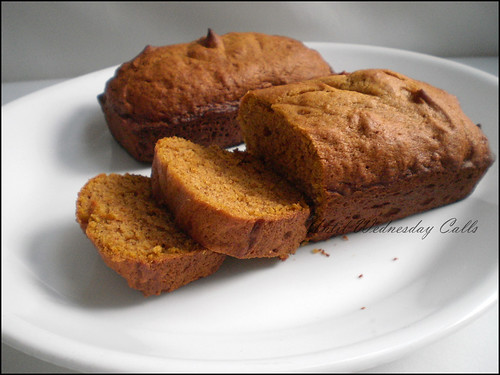
Pumpkin Bread (5)
Starbucks eat your hearts out!

October has arrived, and you know what that means? Pumpkin bread at Starbucks! That is good stuff yes? Heck yes! Now, some of you know how truly awesome this bread is have also been super saddened to find it gone to make room for more seasonal goodies like gingerbread. Also good but not nearly as amazing. Well, it took me two years but I finally came up with a recipe that rivals Starbucks. And not like oh it is better because it is homemade but because it tastes just like it! Want some? I thought so!

Ingredients
1 cup butter
2 cups sugar
4 eggs
2 cups pumpkin puree (I LOVE E.D. Smith's)
1 tbs vanilla
3 cups flour
1/2 tsp salt
2 tsp baking soda
2 tbsp pumpkin pie spice

Modus Operandi
  1. Preheat oven to 350 degrees Fahrenheit 
  2. Cream butter and sugar until fluffy.
  3. Add eggs and beat.
  4. Add 2 cups pumpkin and beat until well mixed.
  5. Add vanilla and beat.
  6. In a separate bowl whisk remaining dry ingredients.
  7. Add to wet ingredients and mix until well combined (But do not over beat)
  8. Pour into greased loaf pans.
  9. bake for 50-60 minutes checking after 50 minutes.
Yields: Two regular loaves or eight mini loaves 
Some notes:
  • I like to top this with pepitas (Uncooked pumpkin seeds) but I ran out for this batch. If you choose to be sure to add them before baking.
  • The loaves pictured are mini loafs and I pulled them out after twenty one minutes in silicone pans.
  • You can substitute three large very ripe bananas for the pumpkin to make banana bread.
  • Wrapped in plastic wrap it stays moist longer than wax paper.
  • Homemade Pumpkin Bread
    Bon Appetit!

Wednesday, October 6, 2010

Wednesday on Wednesday

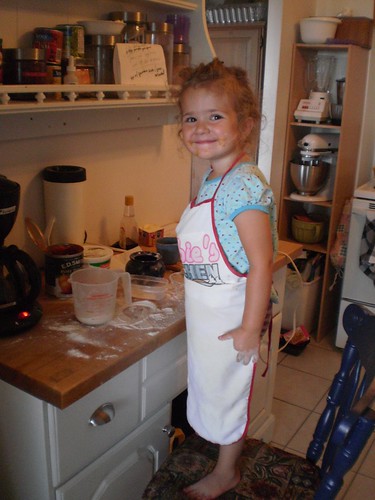
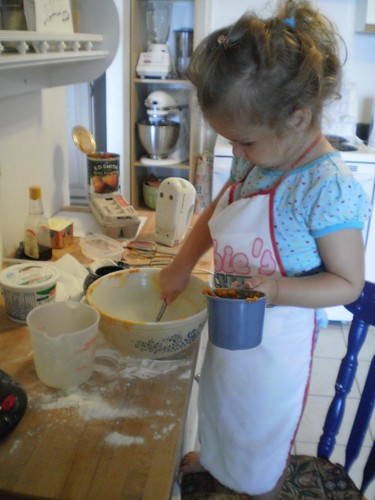
Wednesday and I recently baked up a batch of the most delicious pumpkin bread. So tasty. I love to bake with Wednesday and everytime I do I learn a little bit more about what she loves most about the process.
Baking with Wednesday
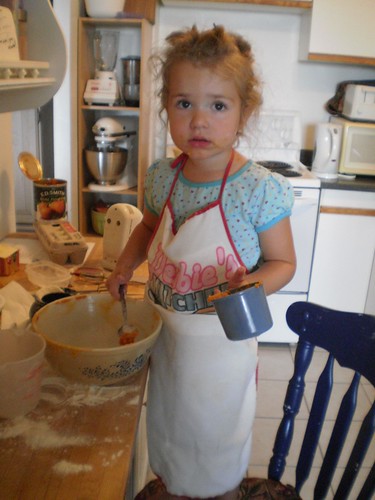
I am not sure if you can see, but she is looking at me out of the side of her eyes, knowing full well I am trying to take a picture. For all the hamming she does for an audience she is incredibly camera shy!
Baking with Wednesday
And here is the smile we have grown to love and adore! You may notice her apron has someone else's name on it (Debbie) and that is because I am a bad mom and have not yet sewn Wednesday one of her own. Christmas? Maybe even this year! For now she wears my mom's because it is pretty small.
Baking with Wednesday
This is really what she loves to do. Mix stuff! She is genuinely upset when it is time to mix the dry with the wet ingredients, she is not yet ready for this kind of closure.
Baking with Wednesday
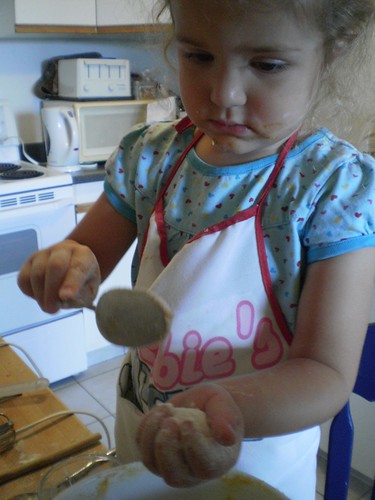
"Really Mom? Have we not taken enough pictures? It is just some flour and pumkin puree." Well, that is what I am sure she would have said could she articulate it that way. Instead, I get this look.
Baking with Wednesday
And finally, I clue give in and give her her own bowl, spoon and flour.
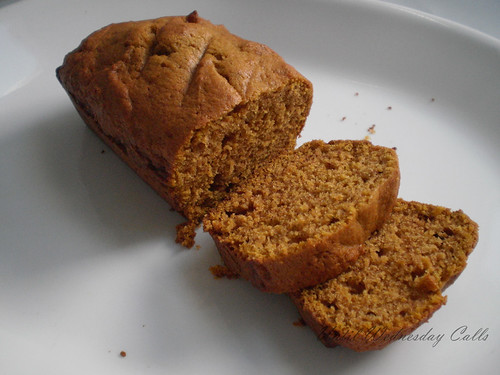
Homemade Pumpkin Bread
This is the final product (not of the flour lump in the above photo.) Pretty tasty looking yes? Come back tomorrow for the recipe! Also, for those of you who have toddlers and pre-schoolers just itching to bake with you I have a post here with some great tips and tricks for making it fun for everyone.