Monday, February 15, 2010

How To - Sparkly Filled Lace Tea Bags for Play

Tea Set (11)

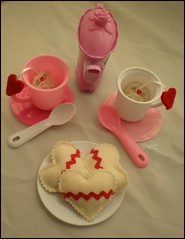
I hope your Valentine weekends were wonderful! It was a warm and loving weekend here indeed. We had a tea party with Wednesday and family for dinner last night. Good food (both real and fake) and good people, how can you go wrong? ♥

I know the previous Felt Sugar Cookie tute was a bit random, but it all came together so quickly I thought I would post it. I made them to go with the sparkly filled lace tea bags of today's construction instructions. Hence the statement of not being able to have a tea party without cookies.

**Note** Due to the nature of the filling, these are not recommended for super small children. Wednesday is two and a half and the hot glue is near impossible to get apart so I am confident that this is safe. If you are at all concerned, do not leave child unattended. OR you could just as easily fill with pieces of felt or stuffing.

I was really excited when I came up with these and even if I severely burned myself twice they turned out awesome! I hope you enjoy them too! Sans burns of course.

Materials:

2" wide lace (roughly 20" long)
Plastic gem stones (or felt scraps)
1/8" ribbon
Red felt
Scissors
Hot glue & gun

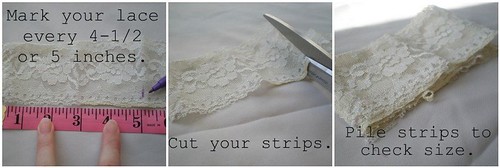
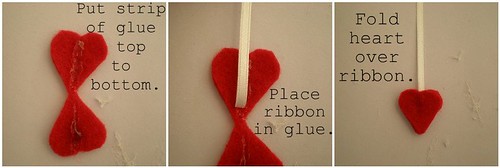
Lace Tea Bag Steps 1-3

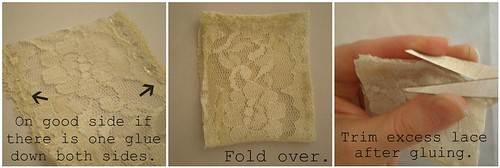
Lace Tea Bag Steps 4-6

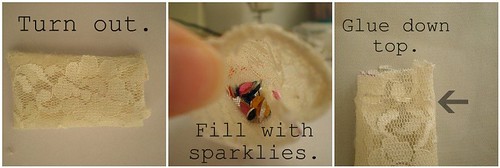
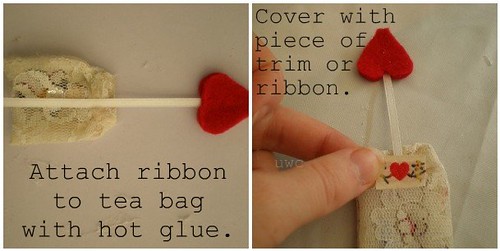
Lace Tea Bag Steps 7-9

Lace Tea Bag Steps 9-11

Lace Tea Bag Steps 12-13

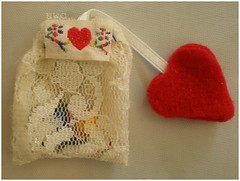
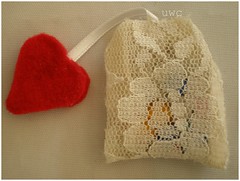
Tea BagLace Tea Bag

Ta -daa! Your front and back views.

Now, you have cookies and tea bags shall we have a tea party?
Tea Set (8)


Linked up to Whatever Goes Wednesday @ Someday Crafts

Sunday, February 14, 2010

Saturday, February 13, 2010

How To - Felt Sugar Cookies


Measure and cut your fabric. I used a cookie cutter for a template.


Sew ric rack to felt hearts in one long strip.


Snip every second felt heart. Fold over and with wrong sides together sew.


Stuff. I found tweezers helpful here.


Trim with pinking shears if you have them and voila, you're done!


You simply must have cookies if you are going to have a Valentine's Tea Party!

Thank You Donna!

P2050004


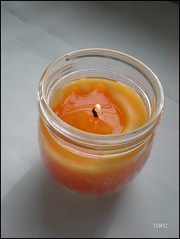
I have a few thank yous owing to Donna of Homemaking Made Easy. First, a thank you for the beautiful candle pictured above. It smells as good as it looks! The label says spiced apple and it does smell like apple pie when burning. A lovely companion whilst sewing. I hadn't sent a thank you yet because I was hoping to surprise you with something nice in the mail, but you know how time can fly!

A second thank you for all of the support she has shown me over the last few weeks. A little bit of praise goes a long way in the blogging world and she has given me enough to last a year.

The third thank you is for making me the first "Featured Follower". How lovely to be in the sidebar of her happy and handy blog.

If you have yet to visit Donna I suggest you do. Her blog Homemaking Made Easy is a lovely combination of housework and house love. She sews, she crafts, she cleans and she loves her family. There is even a post on how to make the gorgeous candle pictured above.

Wednesday, February 10, 2010

Wednesday on Wednesday


Sunday Awesome, originally uploaded by Cara.Mia.

Sideways ponytail, upside down sunglasses, powdered donut face. This is what being two and half is all about.

She loved the softness of the icing sugar. (It was only the second she has ever had.) "So soft and so cozy."

Tuesday, February 9, 2010

How To - Lettuce Edge Ruffle Onesie Refashion

Lookin' Good!

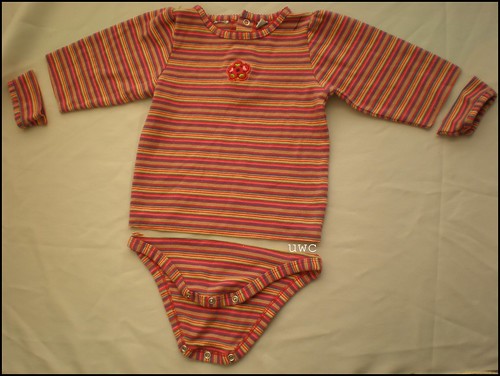
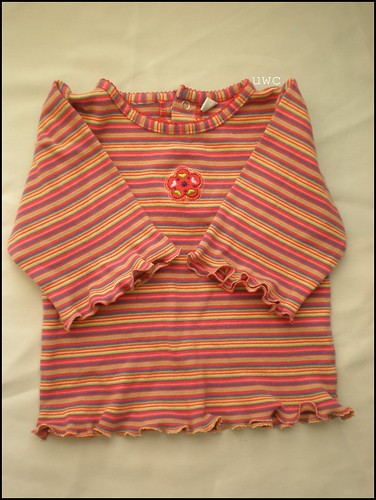
Have you ever done anything so simple and so awesome that you have to share it? That is what this is. I have discovered the fastest way to refashion a onesie ever! For serious, this took me exactly half an hour from beginning to end. It is so simple I thought about not sharing it, but just in case...I mean, my mom who is one of my sewing mentors had no idea you could do this so maybe someone could use a photo tutorial. So, here is how to turn a long sleeve onesie into a 3/4 sleeve t-shirt.

Materials
Onesie that fits child in shoulders and neck.
Scissors
Sewing machine with zig zag stitch.

Construction Instructions

Choose Your Onsie
Choose your onesie, make sure that it is long enough at the hips where you will cut it off. Now, cut off snapable bottom at hips.
Cut off cuffs. These look like they are long but after I cut an inch off they were a perfect 2/4 sleeve.
Practice.
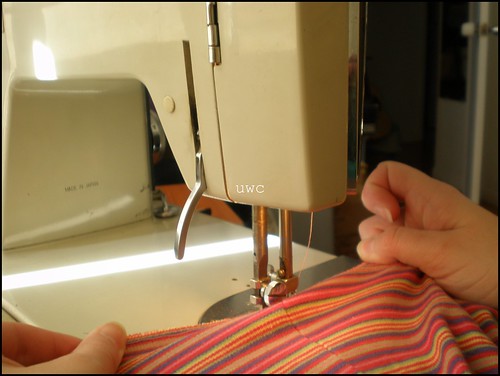
Use the bottom piece you cut off for practice. This helps you set your tension properly and get the hang of pulling and stretching the fabric.
Line it up.
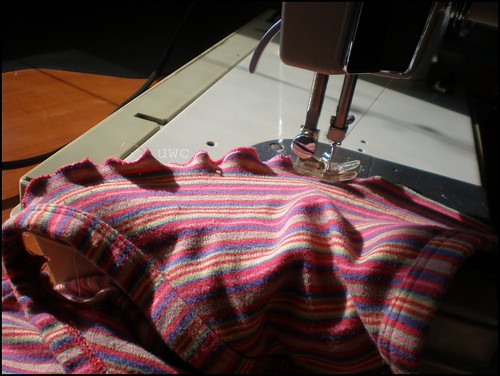
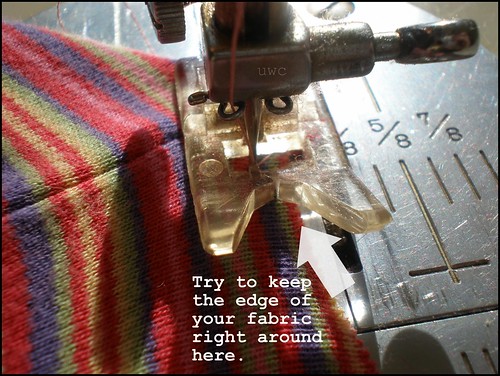
Line the edge of the fabric just beside where the needle lands. This gives you your edge stitch.
Pull.
Pull the fabric out the back and pull the fabric toward you. This makes it super taught so that it contracts nicely when you are done.

Seriously, it is so easy this twenty second video shows it all. Stretch and sew!
Voila.
I am not going to lie, I thought this was one of the cutest things I have done yet!
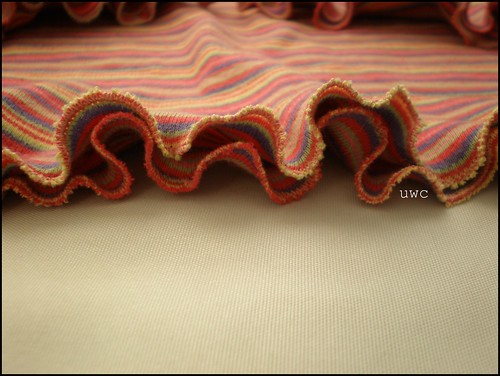
Ruffle Close Up
Ruffle close up.
Lookin' Good!
Refashioning is serious business.

This technique has so many possible applications yo can bet you will see it here a lot in the months to come. Until, happy sewing!

Linked up to:

Whatever Goes Wednesday @ Someday Crafts
Strut Your Stuff @ Somewhat Simple
Hand Me Down Rehab @ Helping Little Hands
Fabulous Friday Finds @ Kojo Designs
Make It & Wear It @ The Train To Crazy

Sunday, February 7, 2010

How To - Machine Made Hemmed Ruffles

It Is Official, I Am Addicted To Ruffles, and after you get the hang of making them you will be too! Do you remember the shaggy ruffled skirt I made Wednesday a couple weeks ago? I love that skirt, and she was able to wear it to a birthday party this weekend. And she looked so cute in it. But, the torn ruffled I made? Well, they are still losing strings and apparently some people care about that sort of thing. ;) So, when I set out to make another skirt for Wednesday's youngest cousin I knew that the ruffles would have to have two finished edges. It was a wee bit tedious, but thanks to two feet I have for my machine it turned out quite wonderfully.
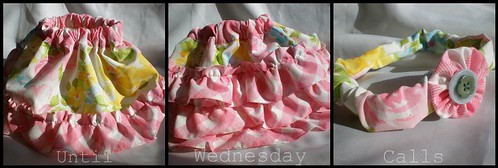
Rufflebum Skirt
I made the skirt from two vintage bed sheets bought from Value Village. You might even recognize the pink and white fabric from my recent mailbox endeavor? I had been trying to think of a skirt for the wee one when I read this post at Confessions of a Sewing Dork. (She is sewing love!) Anyhoo, the ruffles on the bum of her skirt were just the inspiration I needed.
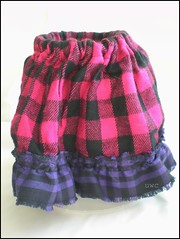

I had originally made this skirt. I had bought both remnants at a thrift shop that morning and just had to use it in some sort of kilty/punky thing. I loved the frayed ruffle look and so I painstakingly zig zagged down the edge of the cut strips of fabric before I gathered it into ruffles and I used another zig zag stitch to attach the ruffle. Like pinking, zig zag stitches inhibit fraying. I even machine washed and dried the skirt to make sure the the ruffles would not continue fraying. And they didn't but it just didn't scream "FIRST BIRTHDAY!" you know? So, I turned to my brightly coloured vintage sheets. Gosh I love them so much.

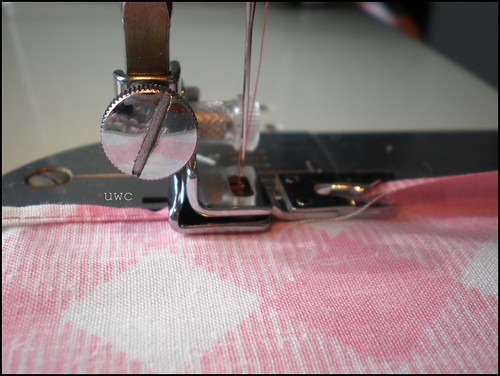
To make the finished ruffles I learned how to use yet another foot of my machine. The adjustable narrow hemmer. This is a brilliant little foot. It gives you an 1/8" rolled hem with little effort. I used this foot to hem the strips and the gathering foot to make the ruffles. I thought, I would share with you a quick photo tute on how to make ruffles with rolled hems. The first half are new photos for the narrow hem foot and the second half has photos from the Ruffled Toddler Skirt tute but they mesh well for this. In case you don't want to scroll through the post, here is link to the flickr set done as a tutorial.

Materials
Fabric, cut in strips (I like two inches if one side is finished if both sides need hemming, 2.5" works well.)
Adjustable holder and adjustable narrow hemmer foot for your sewing machine
Second wound bobbin (You will go through at least 1.5 bobbins for this, if you have more and plan on using the same thread for your project I would wind a third bobbin.)

Construction Instructions
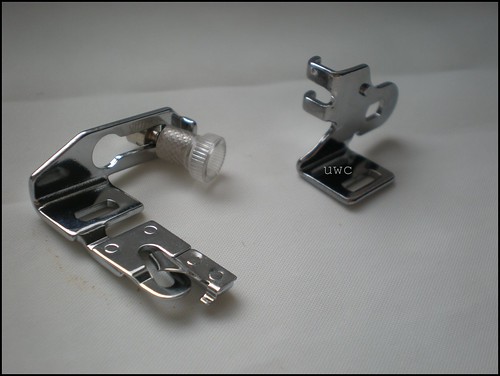
Seperate Pieces
On the left is the adjustable narrow hemmer foot and on the right is the adjustable holder.
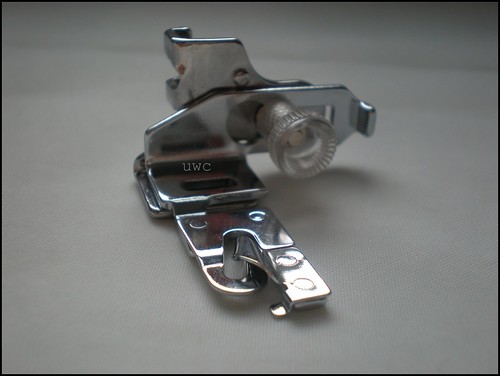
Assembled foot.
Assembled adjustable holder and adjustable narrow hemmer foot.
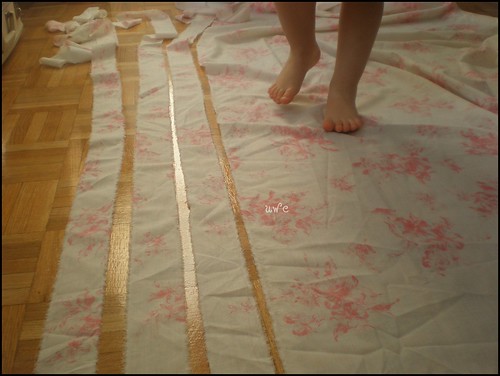
Cut 2" strips
Cut strips from your fabric. TIP. If you are using a sheet and you cut along finished edges you will only have to hem one side of the strips.
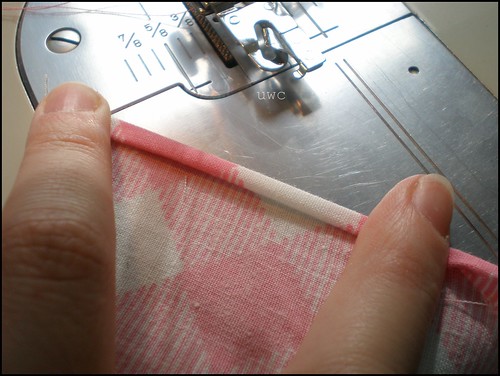
Roll and pinch.
Roll and pinch a couple inches to start the foot off on the right foot. (That is seamstress humour.)

Slide it under.
Slide your rolled and pinched fabric underneath the foot and sew about an inch. Once your seam is started roll your fabric into the scroll and keep sewing.
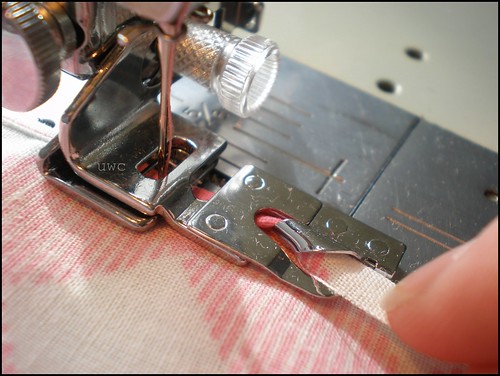
Watch your feed.
This technique really depends on your vigilance in how the fabric is fed in. Too wide and it flattens out for a single layer hem, too narrow and it does the same.
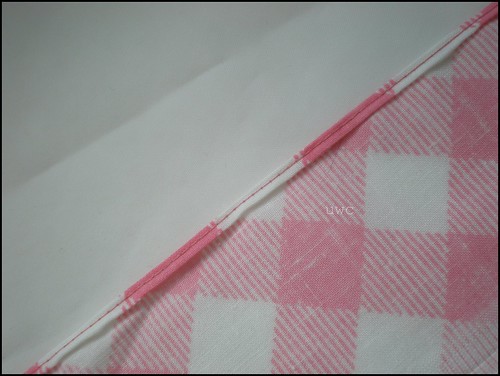
Finished narrow hem.
And voila! You now have strips of fabric with a tiny rolled hem. Rinse and repeat for the other side if your strips have two unfinished edges. If not, move on the the second part, detailing how to turn it into ruffles.

Instructional Insert: before you take off this foot and insert the gathering foot, take your pieces of newly hemmed fabric and join them together to make one long strip. (I didn't attach them before hand because I was unsure if the narrow hemmer scroll could accommodate the doubled material.)But the ruffle foot can no problem so now is when yo want to attach your pieces.
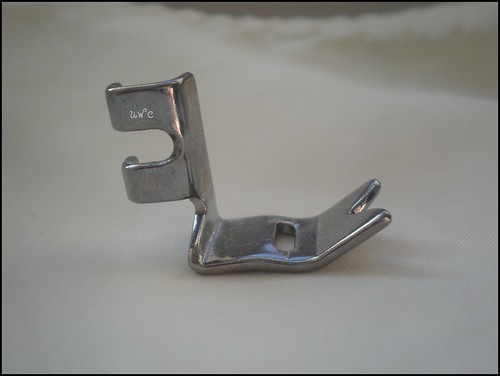
Gathering Foot
This is a gathering foot. It is my new favourite toy. I mean tool! All you do is attach the foot, put one layer underneath instead of the usual two and 'sew'. Sounds too good to be true right? Not so. Adjust your tension accordingly. The looser the tension, the looser your ruffles, the tighter your tension, the fuller the gather.
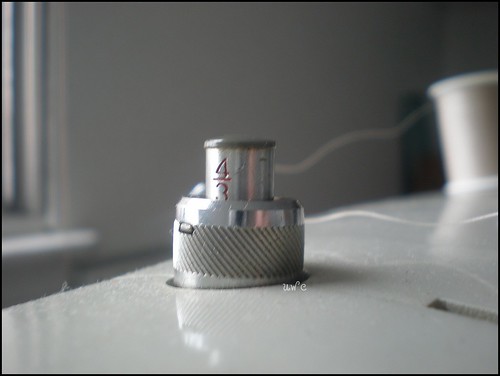
Pressure Regulator
I did this on the tightest tension with the presser regulator 3/4 of the way down to achieve the hand-gathered look, but if you press it down fully you get a perfect, professional looking ruffle.
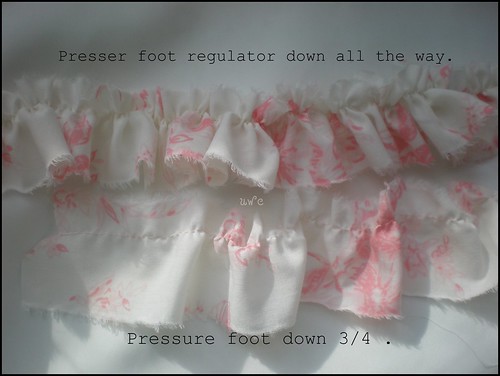
Two ruffles
Don't forget, the fuller the ruffle the more material you will need to achieve your desired length of ruffle.
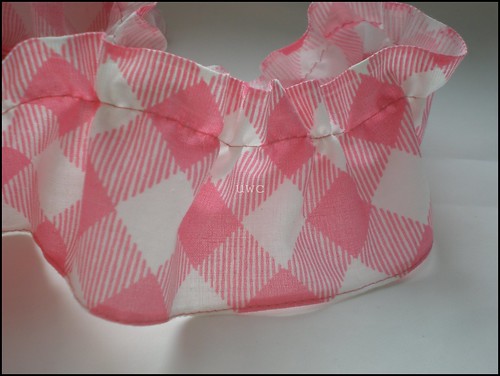
Perfect ruffles.
Isn't it gorgeous? See how I used the edge of the sheet for the top of the ruffle so I only had to hem the bottom?
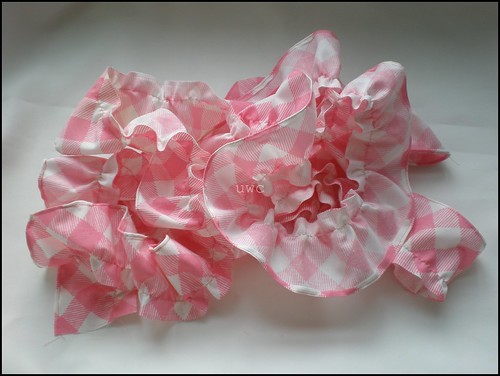
Before you know it...
You now have lots of beautiful handmade ruffles!
The end.

I hope that was clear, and I hope you are able to go forth and create. Thanks for stopping by!

Friday, February 5, 2010

D'aww, I had a good idea!
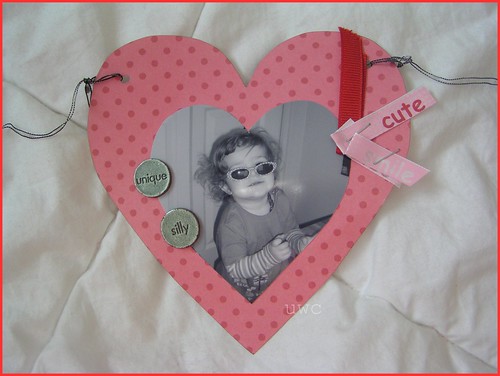
I am being linked to over at Out of Office (A Fedex/Office site). My Valentine Photo Garland is being linked to.
Here is a quick description of their blog from an excerpt from the email I received requesting permission to link. "On the blog, we highlight ideas for the holidays, home projects, event planning, and more. In an upcoming post we’ve planned for February, we will share a round-up of Valentine’s gifts, décor and projects, along with links to great ideas we’ve seen online..."

I thought it was neat to be seen in the blogging world outside of Blogger and Wordpress, especially without me having to pimp my own stuff! :)

Homemade Valentine Garland

Wednesday, February 3, 2010

Wednesday on Wednesday

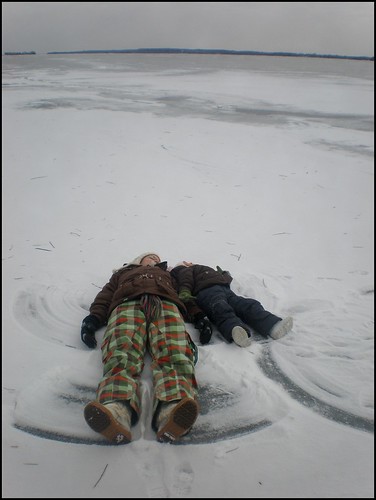
A couple of days ago we had a mild weathered day and although it was gloomy, we took a walk on the frozen shoreline of the Bay of Quinte.

Bay of Quinte (40)

Bay of Quinte (38)

We played with the snow.

Bay of Quinte (34)

We played with grasses.

Bay of Quinte (23)

We made snow angels.

Bay of Quinte (29)

We cuddled.

It was a good day of Wednesday.

Monday, February 1, 2010

How To : Slipcover the Mailbox Part 2 of 2

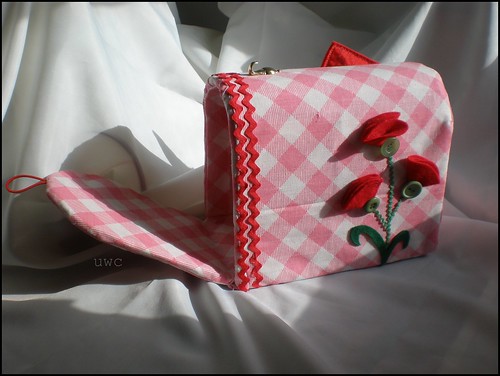
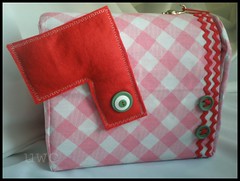
Valentine Mailbox Slipcover

I loved my mailbox, loved it! But I detested my paint job. For serious, it didn’t come out at all the way I pictured it in my head. Partly due to my lack of practice in decorative painting, partly due to my pickiness and partly due to my hating it.
So, I thought of ways to cover it with fabric. At first I was going to Modge Podge the heck out of it. But again, I have no experience with that and with the painting fiasco still fresh in my head I decided to slipcover it. Does that make me weird? Well if this is wrong I don’t want to be right! *ahem* On to the craft . *Author's Note* After writing this tutorial I realized, the entire slipcover could have been made by hot gluing the seams instead of sewing them, seeing how it is not like it has to stand up to washings or anything. So go ahead, glue with all your might!

Materials

Fabric maybe a half yard? I used a vintage sheet I had been saving for a special occasion.
Hair elastic for closure
Something to hook it on like a push pin
Ribbon
Felt
Buttons
Ric Rac
Hot Glue & Glue gun

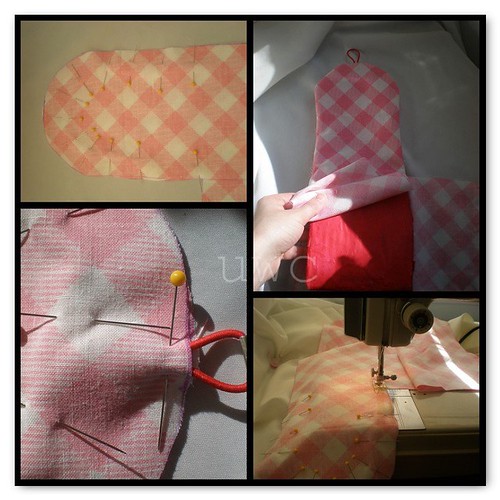
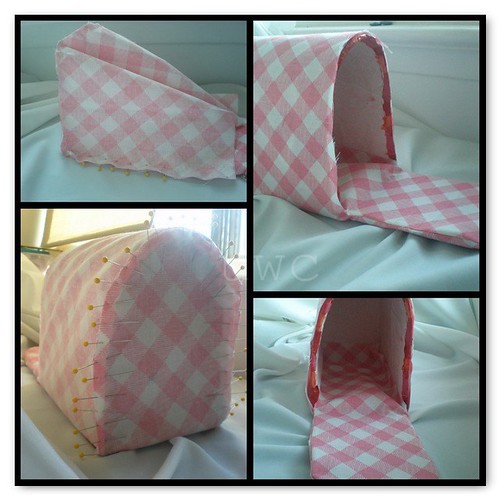
Cut your fabric like in this diagram shown. I would take this opportunity to print it out. Even though it is not a pattern (or even to scale) it will help you when reading the directions below and keep you from having to scroll up whenever I reference it. Sorry for the lack of pattern but I don’t know how to make them printable on more than one page, I should look that up. You’ll notice it looks just like the cardboard pattern but with the door attached. It essentially is. I traced around different parts of my mailbox and added a half inch for seam allowances. This is the basis of the pocket for the door flap to go into. To do that take door flap piece D and put it right sides together with door piece A. Pin together. Don’t forget to add the hair elastic (or ribbon or whatever it is you are using for a closure) in with the pins.

Slipcover Steps Collage 1
You want to sew this and turn it out first. Make sure it fits. Once that is done you can go onto the actual box cover.

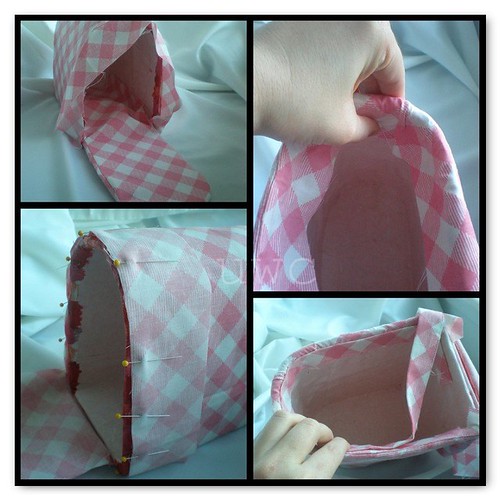
Slipcover Steps Collage 2
With right sides together, pin B to E just like in the bottom left photo. This will make your arch and give your slipcover it's mailbox shape.
Sew. Take out pins and turn right side right and insert mailbox to make sure it fits properly.
Now, flip inside out again and pin C to E like in the top left photo.

Slipcover Steps Collage 3

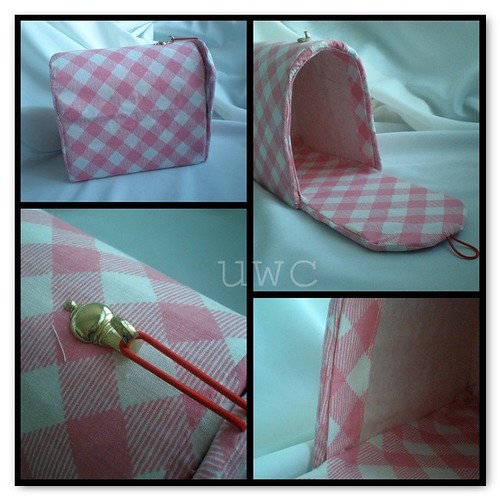
Once you have made sure the cover fits the mailbox you are going to pull our your handy dandy glue gun! Ignore those pins in the bottom left corner. I forgot to add flap G (in the diagram)and had to sew one on to come down over the edge and into the mailbox. It was no big deal but just now the picture made me realize I could save you the step. Now you just glue down the trim to the inside of the mailbox like in the upper right hand corner. When that is fastened, add a ribbon (I used trim from the sheet)to cover the seam inside the arch. Now, glue the flap from the door pocket to the inside base of the mailbox. This was a bit tricky with the whole HOT glue thing, but I got away with only a few battle scars, I am sure you can do way better. Seriously, I haven't picked up a glue gun in years.

Slipcover Steps Collage 4
We are at the home stretch. At the front of the mailbox, you need to add a 'catch' for your elastic closure.
I used this nifty little tack we had laying around from Christmas time. After that it is embellishment time which is completely personal.

Valentine Mailbox Slipcover
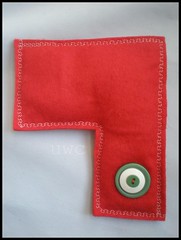
After that you can make your 'flippy thingy' our of felt and stuffing. Simply trace, stitch, stuff and close. I added some great buttons and red thread but you needn't.

Slipcover Details
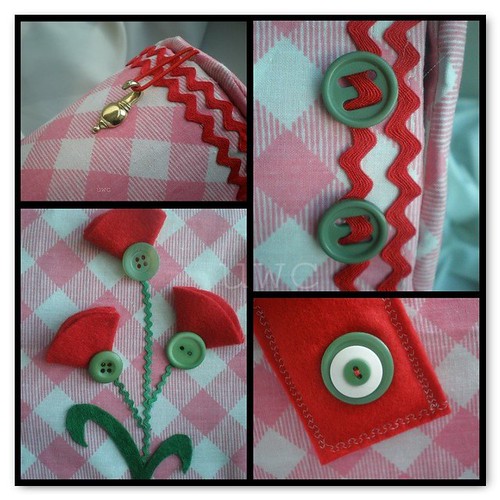
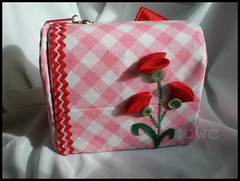
Now, the uber fun stuff. Embellishing! First I glued some green ric rack down as the stems of the flowers. Then I used some felt circles folded into quarters and glued in the middle for flowers. I covered the base of the felt with some groovy green buttons and snipped some green felt like leaves. Loved it, like for serious me and my mailbox are BFFs. To jazz up the rest I added two stripes of red ric rac (BTW I won the ric rac bunches off a woman on Ebay selling off her vintage stash, the plastic near degraded when I opened the package lol.)one stripe has two more buttons that had these great wide holes. And then I hot glued the 'flipper thingy' in place.

Valentine Mailbox SlipcoverValentine Mailbox Slipcover

Ta-Daaa! You are now ready to receive some oh so sweet Valentines!

Click the photo to be taken to the papier mache construction instructions.

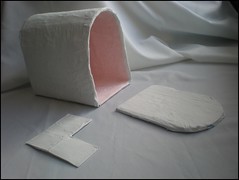
Valentine Papier Mache Mailbox

*Second Author's Note* I realize this how-to doesn't read very smoothly, I tried to keep it simple but I am still learning how to write an effective how to, and as my projects get more complicated, so shall my tutes I guess. I appreciate any and all feedback. And even if I confused the heck out of yas, I hope I mayhaps inspired you even a wee bit?!