
I will warn you it is messy (well more sticky than messy) and Wednesday is not a fan of icky. So this might be more suited to older kids, but at the end of the post you will see Wednesday's version of it. And she loved it so much she would only talk to Bunny until nap time. Below is all the steps photographed. If you need directions there is written instructions below. Have fun!
Materials: (per Bunny)
2 Foam balls in two sizes (Think snowman without the head.)
2 Pipe cleaners
2 plastic jewels for eyes (But you could use buttons, cardboard etc.)
9 Cotton buds (Approx)
Wooden skewer (Super handy)
White pva glue
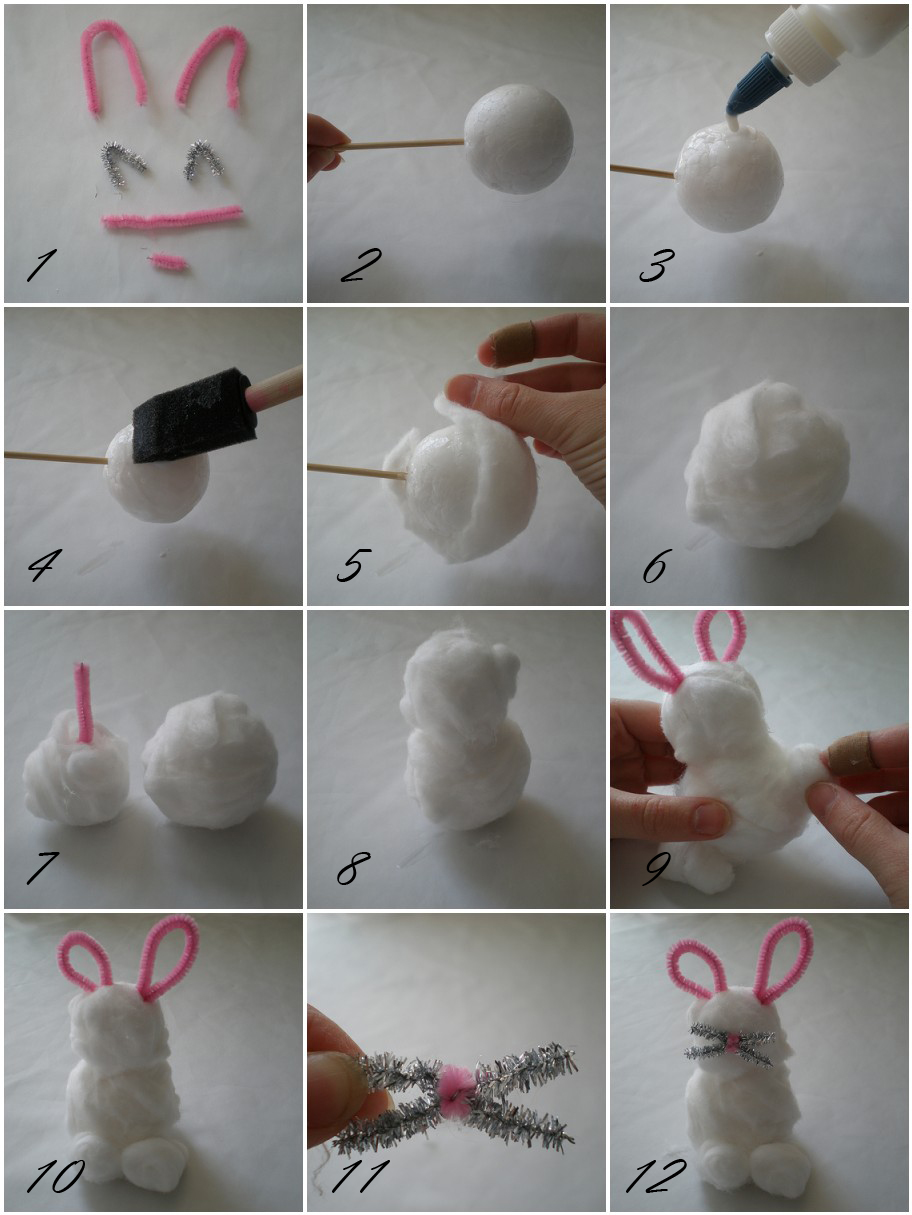
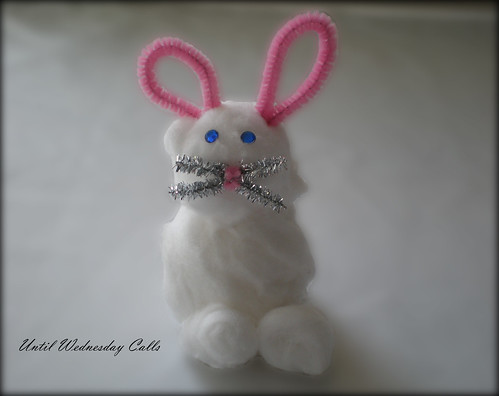
- Cut pipe cleaners so that they look like pictured above. They will be your ears, nose, whiskers and what keeps your head on your body.
- Insert wooden skewer into one ball.
- Add glue.
- Spread glue around.
- Cover ball in unraveled cotton bud. repeat with second ball.
- Insert glue and then a piece of pipe cleaner into hole left by skewer.
- Put smaller ball on larger ball using holes left by skewer.
- Add two holes on top with skewer and insert ears.
- Glue a cotton bud to back for tail.
- Glue two cotton buds to the front for feet. (You might want to play around and make it balance properly.)
- Take your two silver pieces and fold the little pink piece over them, extend the silver pieces to resemble whiskers.
- Glue pink ends into a hole made by skewer. Add your eyes.
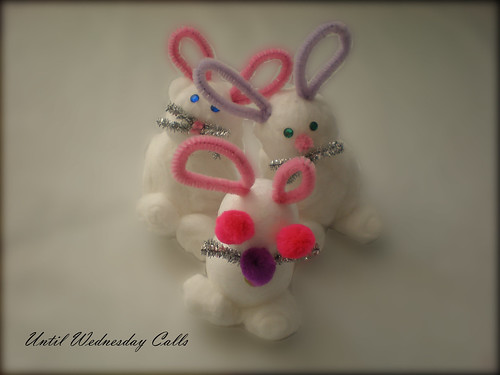
And if your little one has a hard time with the cotton sticking to her fingers, you can always forgo the cotton and smaller embellishments and use plain balls and pom poms. She loved this bunny so much she cried with all her heart when nap time came and she had to put it down. It was SO sad.
For my next cotton bud craft, is the original craft mentioned, the card. I won't write out a tute, but I will provide you with a print out and a photo of our finished card.

Click on the image to take you to the printable size. It should print out on landscape setting on a letter sized piece of paper/card stock.
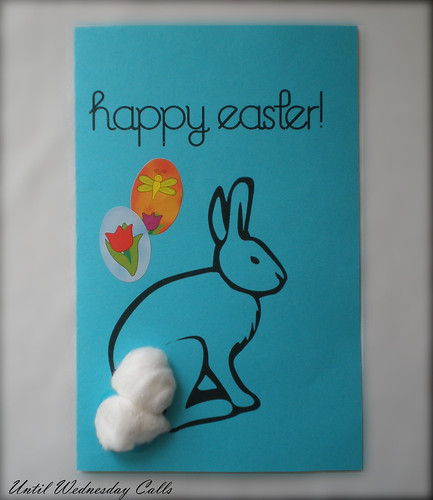
We just glued a cotton bud to the card, added some stickers on the inside and outside and let her go to town with a marker or two. easy peazy lemon squeezy!
Okay, I have to run and get us all ready for an egg hunt! Happy crafting and Happy Easter Weekend!
Linking to:
Fabulous Friday Finds @ Kojo Designs


4 comments:
Too cute! These would look perfect on the table this weekend.
Awwww...cute :)
What a cute craft and terrific card. Amazing ideas both!
These are darling Melissa! How sweet! Wish I was caught up from the trip and could make these. We are headed to the beach tomorrow after church.
No Easter egg hunt this year I guess...Well, at least I can enjoy your family's Easter crafts...
Post a Comment