

This idea rolled around in my head for about a day. I designed and redesigned it a few times and it still didn't turn out anything like the one in my head. But, I love it! I love it so much I am sharing it with you. The tutorial is pretty straightforward but I am including the crown and diamond pattern pieces. I also have a felt tiara in the works but it is an overcast day and getting the final product pictures on the crown were tricky enough. But, the crown looks great and so I have both a tute for you and some great pictures, complete with *gasp* toddler model!
The supplies you need really vary on how you want to embellish your crown. This was a total stashbuster project for me since I actually had everything on hand. Free is my favourite price. Also, even when I paid for the felt it was near free as it was all thrifted pieces. The only thing I used that was not felt was some vintage trim I bought in a lot off of EBay. I had thought about making the diamonds argyle with embroidery thread (that was my initial idea but it looked so good just the way it was) I had thought about using buttons and rhinestones but really, I thought less is more. So, with that ebing said here is the list of materials I used:
Felt (whatever you have on hand, wool or ecospun or even tightly felted sweaters would work I think:
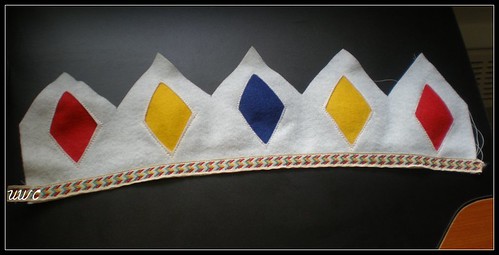
2 pieces 15" in width, 4.5" in height
10 pieces 2.5"x3.5"
Trim:
2 15" pieces (I used some vintage bought on Ebay)
2 12" pieces of ribbon (I used grosgrain leftover from a Christmas gift I received but any ribbon that holds a tied bow would do.)
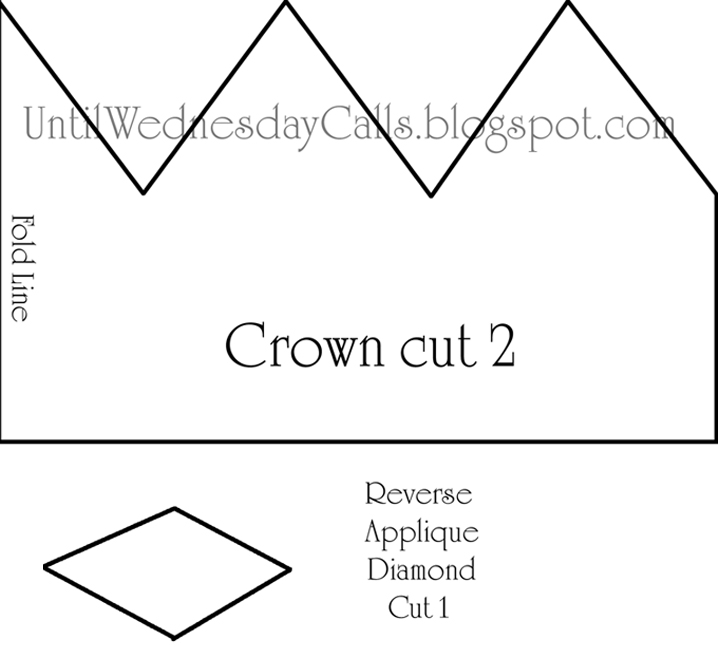
Pattern to be found here. Which took me ages to size properly. If you have a fool proof plan for making patterns in Photoshop in a printable size feel free to let me know it!
And now on to the Construction Instructions;
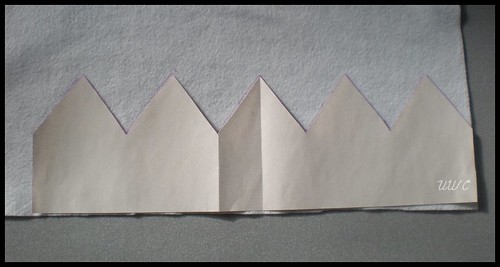
Print pattern and cut out felt crown pieces.
When cutting diamonds, I found it quickest to trace them individually on one crown and then use that crown as a stencil on the second piece of felt. You could use an Xacto knife on a cutting mat but I just used some super sharp snips. Then cut out the rectangles to go behind the cut out diamonds.
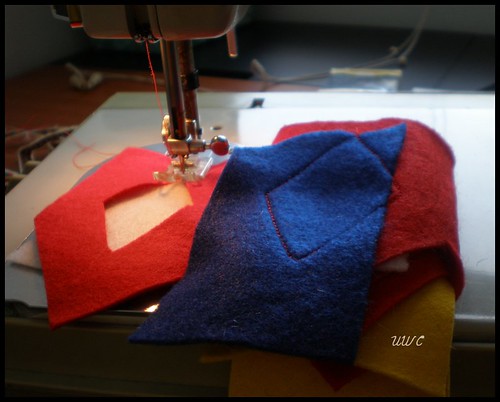
You may find that folding the crown up as you go along prevents it from getting caught on the machine.

Stitch the felt pieces to the back side of the felt crown one at a time. When you are done,trim as close to the stitching as you can. From the back they should look like this. *Note* If you like the look, you could always keep going like that and have an appliqued look instead of reverse applique. I thought about it, but again was seduced by the reverse applique look.
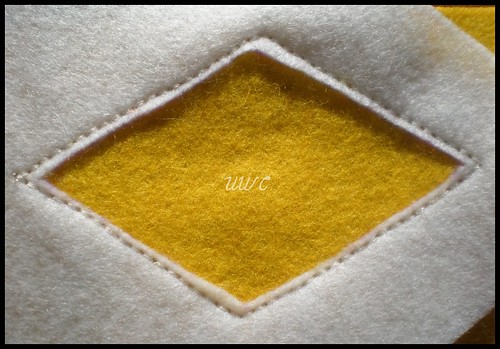
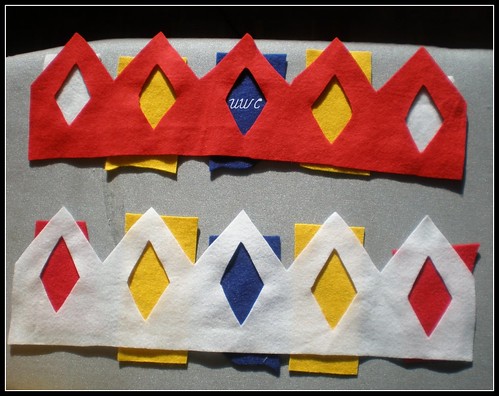
After you have sewn the pieces to the back of the crowns and trimmed away the excess, the front should look like this.
Once all your pieces are trimmed you can add the trim. This was super easy because it had a pattern I could line up with the foot on my machine.
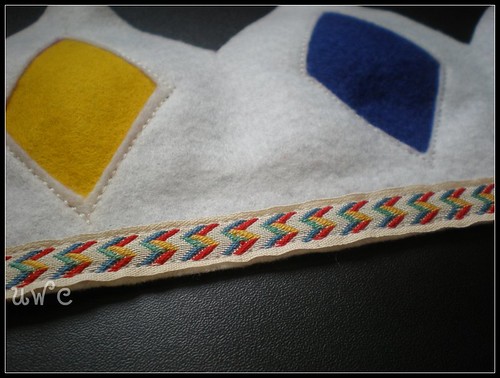
Isn't the vintage trim just adorable?!
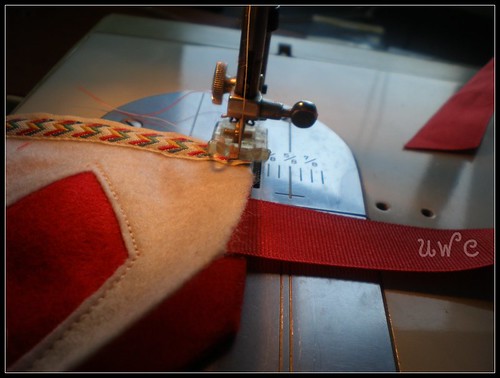
Insert your ribbon between the two layers of felt and sew.
Sew the two felt crowns together, wrong sides facing eachother. Keep stitches as close the the edge as you can get. I did it in a zig zag stitch but I think a running stitch would have been just as nice. Also, I didn't use a contrasting thread but you could.
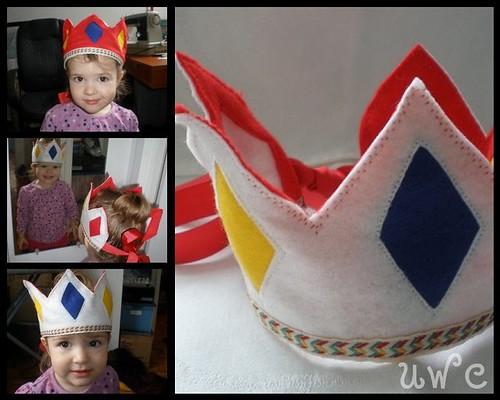
Finally, have your two and a half year old model your after much begging, and promise of her becoming a queen!~
This would have taken me just a couple of hours but I spent some time developing another pattern (a tiara)and then because I was impatient and I didn't double check my tension I had to rip out half a crowns worth of triple stitches. All in all it would have taken a morning had a I had the pattern already and not have to rip out stitches.
The tiara one will be coming soon, I am just waiting for better light. Happy Crafting folks!~
I am linking to a couple of link events. One is @ Skip to My Lou

The other is @ Twice Remembered Make Your Monday.


6 comments:
You just knocked my socks off. I love it. I can't wait to show my girls this, there are going to be begging for it. You did a great job, thank you for sharing.
Cha Cha
Thanks for the nice words! I appreciate them so much!~
those are so sweet! they are perfect!
Thank you very much!
This is so cute! I linked on my Treasures for Tots blog sidebar!
http://treasuresfortots.blogspot.com/
Post a Comment